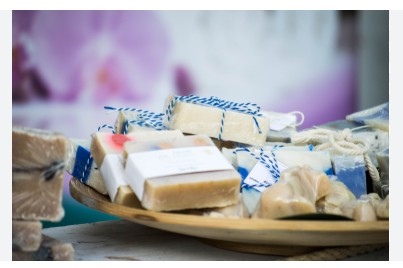
Making handmade soap is a rewarding and creative process. It’s both fun and beneficial.
You can craft unique soaps right at home with simple ingredients. Handmade soap lets you control what goes on your skin, avoiding harsh chemicals. This process also allows for personal touches, like scents and colors. Imagine gifting a bar of soap made with love.
It’s a personal, heartfelt gesture. Plus, making soap can be a relaxing hobby. The beauty of this craft is in its simplicity. Anyone can learn the basics and create something special. Whether you’re new to soap-making or looking to refine your skills, understanding the process is key. Dive into the world of handmade soap and discover the joy of creating your own.

Credit: thevettelfarm.com
Benefits Of Handmade Soap
Handmade soap has gained popularity for its numerous benefits. Unlike commercial soaps, handmade soap is crafted with care, using natural ingredients that nourish and protect your skin. The process of Natural Soap Making ensures that each bar is unique and tailored to meet specific needs. Whether you are interested in Cold Process Soap or exploring Organic Soap Ingredients, the Homemade Soap Benefits are remarkable. Let’s delve into the advantages that make handmade soap a preferred choice for many.
Skin-friendly Ingredients
Handmade soap often features Skin-friendly Ingredients that offer gentle care for all skin types. These soaps typically include Organic Soap Ingredients that are free from harsh chemicals. Here’s what makes them special:
- Essential Oils For Soap: Commonly used in Diy Soap Techniques, essential oils provide natural fragrance and therapeutic properties.
- Natural Oils: Oils like coconut, olive, and shea butter moisturize and hydrate the skin, leaving it soft and supple.
- Glycerin Soap Making: Glycerin, a byproduct of the soap-making process, helps retain moisture and prevents dryness.
Many prefer Cold Process Soap for its ability to preserve these ingredients’ benefits. This method ensures that the soap retains its nourishing properties, making it ideal for sensitive skin. A table of common ingredients can help understand their benefits:
| Ingredient | Benefit |
|---|---|
| Coconut Oil | Moisturizes and cleanses |
| Olive Oil | Rich in antioxidants |
| Shea Butter | Improves skin elasticity |
Eco-friendly Choices
Handmade soap offers Eco-friendly Choices that appeal to environmentally conscious consumers. Sustainable Soap Production uses natural resources responsibly, reducing the environmental impact. Here are some eco-friendly aspects:
- Biodegradable Ingredients: Handmade Soap Recipes use materials that break down naturally, minimizing pollution.
- Sustainable Packaging: Many soap crafters choose recyclable or reusable packaging to lessen waste.
- Local Sourcing: Supporting local farmers and suppliers reduces transportation emissions.
Soap Crafting Tips often emphasize choosing eco-friendly practices. By opting for handmade soap, you contribute to a sustainable lifestyle. The use of organic and natural ingredients supports biodiversity and helps preserve the ecosystem. A table below highlights some eco-friendly practices:
| Practice | Impact |
|---|---|
| Biodegradable Ingredients | Reduces pollution |
| Sustainable Packaging | Minimizes waste |
| Local Sourcing | Supports local economy |
Essential Tools And Ingredients
Making handmade soap at home is a delightful and rewarding experience. Understanding the essential tools and ingredients needed is crucial for crafting high-quality soap. Whether you’re a beginner or have some experience, having the right tools and ingredients will streamline the process and ensure safety. In this section, we’ll explore the basic tools required and the common ingredients used in soap making.
Basic Tools Needed
Creating soap at home requires some fundamental tools. These tools will help you measure, mix, and mold your soap effectively. Let’s look at what you’ll need:
- Digital Scale: Accurate measurement is crucial. A digital scale ensures precision when weighing ingredients.
- Thermometer: A thermometer helps monitor the temperature of your oils and lye, ensuring they mix properly.
- Mixing Bowls: Use heat-resistant bowls for mixing your soap ingredients. Glass or stainless steel bowls are ideal.
- Stick Blender: A stick blender speeds up the mixing process, reducing the time needed to reach trace.
- Soap Mold: Molds shape your soap. Silicone molds are popular due to their flexibility and ease of use.
- Safety Gear: Protect yourself with gloves and goggles. Lye can be hazardous without proper safety measures.
These tools form the foundation of your soap-making toolkit. Investing in quality tools can enhance your soap-making experience and results.
Common Ingredients Used
Handmade soap requires specific ingredients that contribute to its texture, scent, and cleaning properties. Here are the common ingredients used:
| Ingredient | Purpose |
|---|---|
| Oils/Fats | Form the base of the soap. Common options include olive oil, coconut oil, and palm oil. |
| Lye | Essential for saponification. Transforms oils into soap. |
| Distilled Water | Used to dissolve lye. Ensures purity and consistency. |
| Essential Oils | Add fragrance. Popular choices include lavender and peppermint. |
| Colorants | Provide color. Natural options include clays and activated charcoal. |
These ingredients are the backbone of your soap recipe. Choosing quality ingredients impacts the final product’s feel, scent, and appearance. Experimenting with different combinations can lead to unique and personalized soap creations.
Cold Process Method
Creating handmade soap using the Cold Process Method is a rewarding and creative hobby. This method allows for crafting beautiful, customized bars of soap at home. With a few simple ingredients and some patience, you can make your own artisan soap. Cold Process Soap involves mixing natural soap ingredients, which then undergo a soap curing process over several weeks. This method is perfect for those who enjoy Diy Soap Making and want to explore homemade soap recipes.
Step-by-step Guide
Making Cold Process Soap requires careful attention to detail. Here is a simple guide to get you started:
- Gather your soap making supplies, including oils, lye, water, and essential oils for soap.
- Measure the oils and melt them in a saucepan until fully liquid.
- In a well-ventilated area, carefully mix lye with water. Lye safety is crucial here. Always wear gloves and goggles.
- Once the lye mixture cools, slowly add it to the melted oils.
- Stir the mixture until it reaches “trace,” a pudding-like consistency.
- At this point, add essential oils or other natural ingredients for scent and texture.
- Pour the mixture into a mold and cover it for 24 hours.
- After 24 hours, remove the soap from the mold and cut it into bars.
The soap curing process is next. Place the bars in a cool, dry area for 4-6 weeks. This allows the soap to harden and any remaining lye to neutralize. Enjoy your homemade soap recipes and the joy of artisan soap crafting!
Safety Precautions
Safety precautions are essential in Diy Soap Making, especially when using lye. Follow these tips to ensure a safe soap-making experience:
- Always work in a well-ventilated area to avoid inhaling fumes from the lye.
- Wear protective gear, including gloves, goggles, and long sleeves, to prevent skin contact.
- Carefully measure all ingredients to maintain the correct balance in your soap mixture.
- Keep children and pets away from the workspace to prevent accidents.
- Store lye and other soap making supplies in a safe, locked location.
Understanding lye safety is critical in this process. Always add lye to water, not water to lye, to avoid dangerous reactions. If lye comes in contact with your skin, rinse immediately with vinegar and water.
Lastly, during the soap curing process, ensure your soaps are placed in a safe area where they will not be disturbed. These precautions help create a safe and enjoyable experience in artisan soap crafting.
Hot Process Method
The art of crafting handmade soap offers a personal touch to skincare routines. Among various soap-making methods, the Hot Process Method stands out for its unique characteristics. This method involves cooking the soap mixture, resulting in a rustic and natural appearance. The process accelerates saponification, allowing soap to be ready for use sooner. It’s perfect for those eager to explore the world of handmade soap with a hands-on approach.
Advantages Of Hot Process
The Hot Process Method offers several benefits for soap makers, especially beginners. Here are some key advantages:
- Faster Cure Time: Unlike the cold process method, hot process soap can be used within a week. This is because the heat accelerates saponification.
- Customizable Textures: The soap has a rustic look, making it ideal for those who enjoy a more natural appearance.
- Flexible Additions: Additives like fragrance and color can be mixed at the end. This reduces the risk of them being altered by the lye.
- Less Risk of Error: The cooking process makes it easier to fix mistakes, such as separating or uneven mixing.
Here’s a quick comparison between hot and cold process methods:
| Feature | Hot Process | Cold Process |
|---|---|---|
| Cure Time | 1 week | 4-6 weeks |
| Texture | Rustic | Smooth |
| Additive Flexibility | High | Moderate |
Cooking The Soap
Cooking the soap is the core of the hot process method. Follow these steps to ensure success:
- Prepare Ingredients: Measure your oils, lye, and water carefully. Use a kitchen scale for accuracy.
- Mix Lye Solution: Slowly add lye to water in a well-ventilated area. Stir until dissolved.
- Heat Oils: Melt the oils in a slow cooker. Combine them until they reach a uniform temperature.
- Combine Mixtures: Carefully pour the lye solution into the melted oils. Use a stick blender to mix until trace.
- Cook the Soap: Set your slow cooker to low. Stir occasionally. The soap will go through different stages – from mashed potato-like to a gel phase.
- Check for Doneness: Use a pH strip to ensure the soap is neutral. Aim for a pH of 7-10.
- Add Fragrance and Color: Once cooked, add your desired scents and colors. Stir thoroughly.
- Mold the Soap: Pour the mixture into a mold. Let it cool and harden before cutting.
Cooking the soap requires patience and attention. But the reward is a batch of personalized, ready-to-use soap.
Melt And Pour Technique
Handmade soap offers a personal touch, blending creativity with self-care. The Melt and Pour Technique is a beginner-friendly method that allows soap enthusiasts to craft beautiful bars with ease. This technique eliminates the need for handling lye, making it a safer option for newcomers. It involves melting a pre-made soap base, then pouring it into molds after adding desired colors, fragrances, and other ingredients. The process is simple, allowing you to focus on the creative aspects of soap making. Let’s delve deeper into how you can start and personalize your creations.
Easy To Start
The Melt and Pour Technique is ideal for beginners due to its simplicity. You only need a few basic supplies to get started:
- Soap base: Available in various types like glycerin, goat milk, and olive oil.
- Microwave or double boiler: Used for melting the soap base.
- Soap molds: Choose from plastic, silicone, or metal molds.
- Optional fragrance oils and colorants.
Here’s a simple process to guide you:
- Cut the soap base into small cubes for easy melting.
- Melt the cubes using a microwave or double boiler.
- Add fragrances and colors after melting.
- Pour the mixture into molds.
- Let the soap cool and harden for a few hours.
Once solidified, your soap is ready to use or gift. This method is not only easy but also quick, making it perfect for those with limited time.
Creative Additions
With the Melt and Pour Technique, creativity knows no bounds. Experiment with different ingredients to personalize your soap:
- Essential Oils: Enhance aroma and therapeutic benefits.
- Natural Colorants: Use mica powders, clays, or spices for vibrant colors.
- Exfoliants: Incorporate oatmeal, seeds, or herbs for texture.
- Botanicals: Add dried flowers or leaves for decorative appeal.
You can use a variety of molds to shape your soap, from simple rectangles to intricate designs. Here’s a table with some popular mold shapes and their uses:
| Mold Shape | Use |
|---|---|
| Rectangle | Classic soap bars |
| Round | Hand soaps |
| Novelty Shapes | Gift soaps |
Mix and match these elements for unique combinations. Your handmade soap can reflect your style and preferences, making each bar a personal creation. Enjoy the process and let your imagination run wild.
Fragrance And Color Options
Creating handmade soap allows you to express creativity and personalize your skincare routine. One of the most delightful aspects of soap-making is choosing the right fragrance and color. These elements not only enhance the appeal of the soap but also provide a unique sensory experience. Understanding how to select scents and natural colorants can transform a simple bar of soap into a work of art.
Choosing Scents
Scents play a significant role in the soap-making process. They can evoke memories, uplift your mood, or provide a calming effect. When selecting a fragrance, consider the following tips:
- Essential Oils: These are natural oils obtained from plants. They provide a pure and subtle fragrance. Popular options include lavender, eucalyptus, and peppermint.
- Fragrance Oils: These are synthetic and offer a wider range of scents. They can mimic almost any aroma, from fresh linen to exotic fruits.
- Blending Scents: Experiment with combining different oils. Pair floral notes with citrus for a refreshing blend or mix spice with vanilla for a warm, cozy scent.
Considerations for scent selection:
| Type of Oil | Benefits | Drawbacks |
|---|---|---|
| Essential Oils | Natural, therapeutic properties | Limited scent range, can be costly |
| Fragrance Oils | Wide variety, more affordable | Synthetic, may cause allergies |
Natural Colorants
Adding color to your soap enhances its visual appeal. Using natural colorants is a safe and eco-friendly option. Here are some popular choices:
- Clays: French green clay or rose clay can add gentle hues while providing detoxifying benefits.
- Herbs and Spices: Turmeric gives a warm yellow, while spirulina offers a green tint. These add both color and mild exfoliation.
- Fruit and Vegetable Juices: Beet juice can create pink shades, and carrot juice can give a vibrant orange.
Consider these factors when choosing colorants:
- Skin Sensitivity: Some natural colorants, like cinnamon, can irritate sensitive skin.
- Color Stability: Some colors may fade over time. Test small batches first.
- Desired Effect: Decide if you want a solid color or a marbled effect.
Natural colorants provide a gentle way to add beauty and character to your handmade soap.
Curing And Storing Soap
Handmade soap making is an art. It combines creativity with natural ingredients to produce unique bars of soap. Once you’ve mixed your homemade soap recipes using essential oils and fragrance oils, curing and storing soap becomes crucial. This process ensures your cold process soap hardens well and remains effective. Proper curing and storage are essential for maintaining the quality and longevity of your soap. Let’s delve deeper into these two important stages.
Curing Process
Curing is vital for homemade soap. It allows the soap to harden and complete the saponification process. This process typically lasts four to six weeks. During curing time, moisture evaporates, resulting in a harder, longer-lasting bar.
Follow these steps for effective curing:
- Space: Arrange your soaps on a rack. This ensures air circulation around each bar.
- Temperature: Maintain a cool, dry environment. Avoid direct sunlight, which can affect the soap’s quality.
- Turning: Flip the soap bars occasionally. This prevents warping and ensures uniform drying.
Here’s a simple table to guide you:
| Step | Description |
|---|---|
| Space | Use racks for air circulation. |
| Temperature | Keep cool and dry. |
| Turning | Flip bars regularly. |
Ensure lye safety during soap making. Use gloves and goggles when handling soap making supplies. Proper curing preserves the integrity of the essential oils used.
Best Storage Practices
Storing your cured soap correctly extends its shelf life. It keeps the soap fresh and fragrant. Follow these soap storage tips:
- Containers: Use airtight containers. This prevents moisture from entering and degrading the soap.
- Location: Store in a cool, dark place. Light exposure can fade colors and scents.
- Separation: Keep different soap types separate. This avoids scent and ingredient mixing.
Consider these additional tips:
- Soap Molds: Choose molds wisely. They affect the soap’s shape and ease of storage.
- Fragrance Oils: Preserve scents by avoiding heat exposure.
Proper storage keeps your soap ready for use. It also maintains the benefits provided by natural ingredients. Following these practices ensures your handmade soap remains high-quality and effective over time.

Credit: www.healthline.com
Customizing Your Soap
Making handmade soap is a delightful craft that allows you to create something personal and unique. One of the most exciting aspects of soap making is the ability to customize your soap. By adding personal touches, you can create soaps that not only look beautiful but also serve specific needs. Whether you want a soap that gently exfoliates your skin or one that fits a specific theme, customization is key. Let’s explore how you can tailor your soap to your preferences.
Adding Exfoliants
Exfoliants are great for removing dead skin cells and giving your skin a fresh, smooth feel. Adding exfoliants to your handmade soap can enhance its functionality. Some popular natural exfoliants include:
- Oatmeal: Gentle on the skin, perfect for sensitive skin types.
- Coffee Grounds: Ideal for invigorating and energizing your skin.
- Poppy Seeds: Provide a mild exfoliation and a unique texture.
When adding exfoliants, measure carefully to achieve the right texture. Use a tablespoon per pound of soap base as a general guideline. Here’s a simple table to help you decide:
| Exfoliant | Texture | Best For |
|---|---|---|
| Oatmeal | Fine | Sensitive Skin |
| Coffee Grounds | Coarse | Normal to Oily Skin |
| Poppy Seeds | Medium | All Skin Types |
Experiment with different exfoliants to find the best fit for your skin. Remember, less is more. Start with small amounts and adjust as needed.
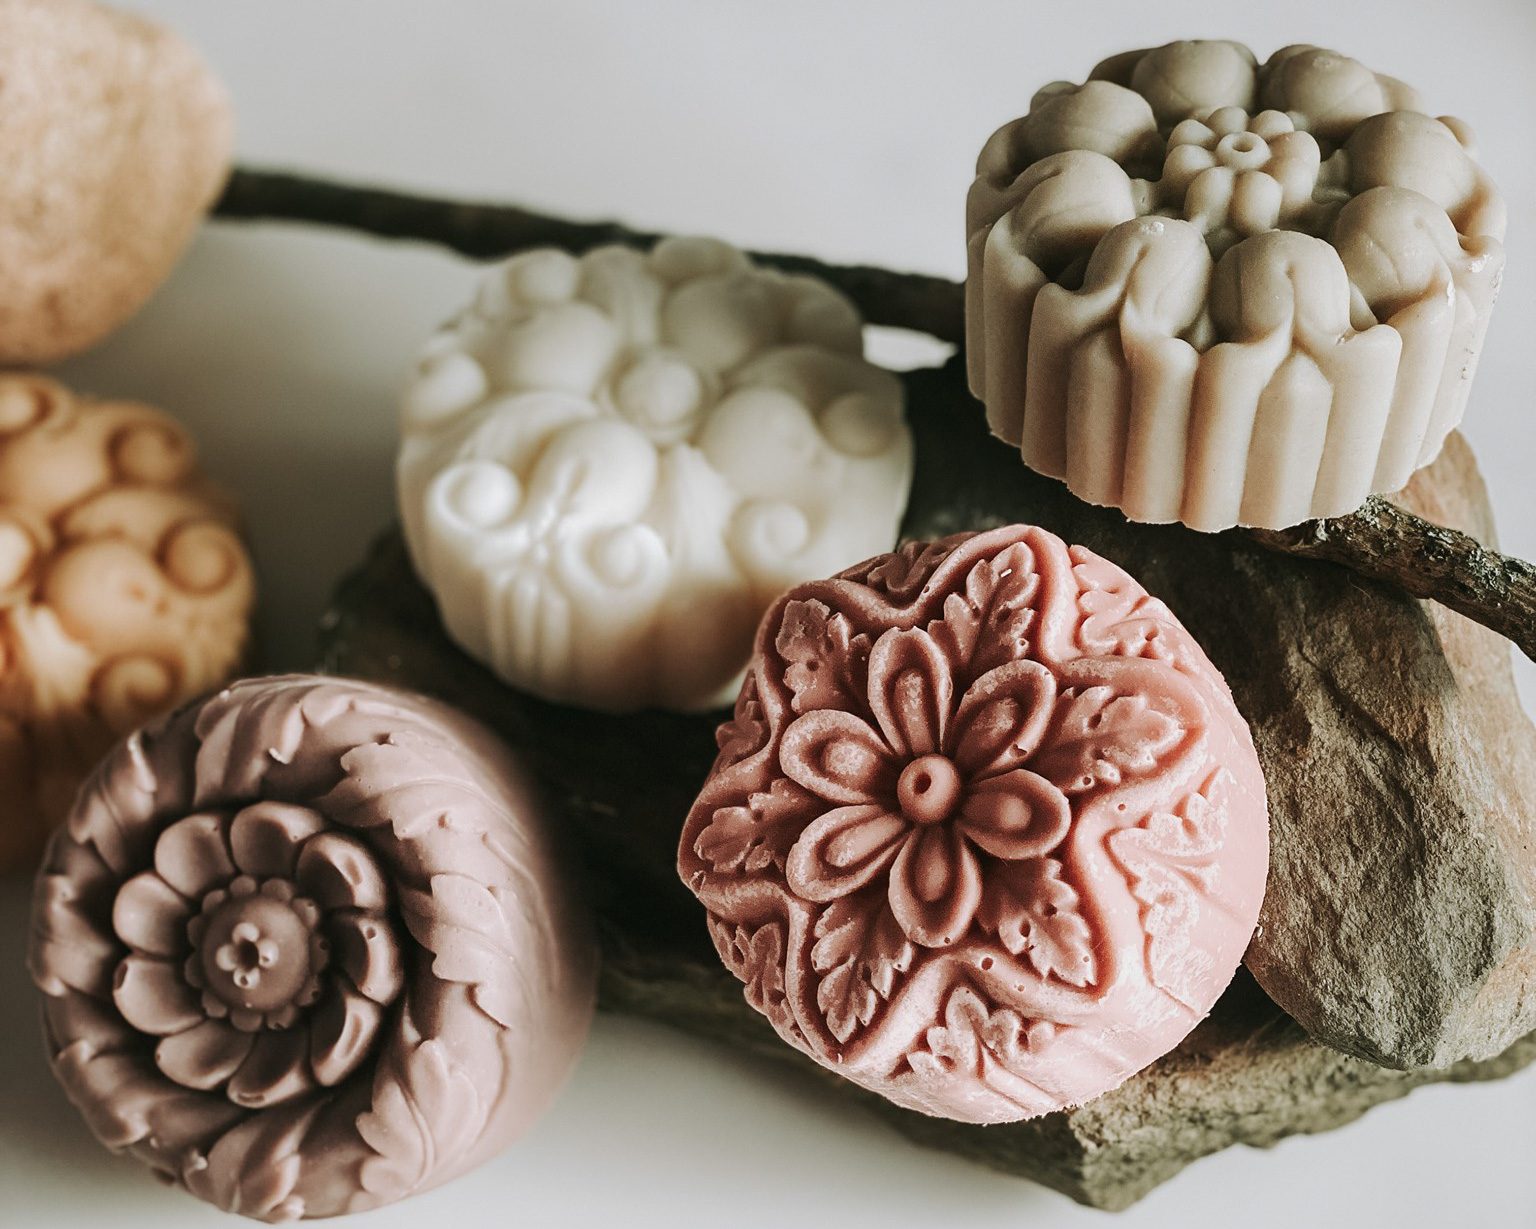
Creating Unique Shapes
The shape of your soap can add an extra layer of personalization. Unique shapes make your soap visually appealing and fun to use. Here are some creative ways to shape your soap:
- Silicone Molds: Available in various designs like flowers, hearts, or animals. Easy to use and release.
- Cookie Cutters: Use them to cut out shapes after pouring the soap into a flat mold.
- Layering Colors: Pour different colored layers into a loaf mold, then slice into multi-colored bars.
Creating unique shapes requires a bit of planning. Make sure your soap is at the right consistency before using molds or cutters. Not too soft, not too hard. Here’s a quick tip: chill your mold in the fridge for a few minutes. This helps in releasing the soap smoothly.
With a bit of creativity, your handmade soaps can become a reflection of your style. Enjoy the process and let your imagination guide you.
Handmade Soap How To Make Soap Step By Step
Making handmade soap is a rewarding and creative process. It allows you to customize your soap with your favorite scents and ingredients. Understanding the steps involved is essential for crafting the perfect bar of soap. Whether you are interested in learning how to make soap without lye, are a beginner, or want to make bathing soap at home, this guide will help you on your soap-making journey.
Handmade Soap How To Make Soap Without Lye
Creating soap without lye is a popular method for those who want a safer and easier process. Melt and pour soap is a great option. This method uses a pre-made soap base, eliminating the need for lye.
- Purchase a melt and pour soap base from a craft store.
- Cut the soap base into small cubes. This helps it melt evenly.
- Place the cubes in a microwave-safe bowl.
- Heat in the microwave in 30-second intervals, stirring between each.
- Once melted, add your desired fragrance or essential oils.
- Pour the melted soap into a silicone mold.
- Let it cool and harden for several hours.
This method is perfect for how to make chemical-free soap at home. The pre-made bases are often natural and free from harsh chemicals.
Handmade Soap How To Make Soap For Beginners
For beginners, starting with a simple recipe is key. Cold process soap is a traditional method but requires careful handling of lye. Here’s a basic approach:
- Gather your ingredients: oils (like olive or coconut), lye, and water.
- Wear safety gear: gloves and goggles.
- Mix lye with water in a well-ventilated area.
- Heat your oils in a pot until melted.
- Slowly mix the lye solution with the oils.
- Blend with a stick blender until it reaches trace (pudding-like consistency).
- Add any colors or fragrances.
- Pour into a mold and let it sit for 24-48 hours.
This method is a great starting point for those interested in how to make local white soap. Customize the recipe with local ingredients to create a unique product.
How To Make Bathing Soap At Home
Making bathing soap at home can be a delightful experience. It allows you to tailor the soap to your skin’s needs. Here’s a straightforward method using a hot process:
- Combine oils like olive or coconut in a slow cooker.
- Add a lye solution carefully, stirring continuously.
- Cook on low heat, stirring occasionally, for about an hour.
- Once the mixture is thick and gel-like, it’s ready for additives.
- Mix in essential oils or herbs for fragrance and texture.
- Spoon the soap into a mold and let it cool.
This method is great for those wanting to learn how to make chemical-free soap at home. The slow cooker ensures a thorough blend, resulting in a gentle, skin-friendly soap.
Credit: www.winterthur.org
Frequently Asked Questions
What Are The Ingredients For Homemade Soap?
Homemade soap typically includes oils like olive or coconut, lye, water, and optional fragrances or colorants. Use essential oils for scent and natural colorants like herbs or clay for color. Customize textures by adding oatmeal or seeds. Always follow safety guidelines when handling lye.
Do I Need Fda Approval To Sell Soap?
No, you don’t need FDA approval to sell soap. The FDA regulates soap only if it makes cosmetic or therapeutic claims. Ensure your soap is labeled correctly and doesn’t claim to treat or prevent diseases. Always comply with local regulations and guidelines for selling personal care products.
How Do I Start Making Homemade Soap?
Start by gathering ingredients like oils, lye, and fragrances. Follow a reliable recipe for guidance. Wear safety gear and mix ingredients carefully. Pour the mixture into molds and let it cure for several weeks. Research soap-making techniques to improve skills.
Enjoy your homemade soap!
What Is The Biggest Mistake First Time Soapmakers Make?
The biggest mistake first-time soapmakers make is not accurately measuring ingredients. Precise measurements are crucial for successful soapmaking. Incorrect proportions can lead to poor texture or ineffective soap. Always use a reliable scale and follow the recipe closely to ensure desired results and avoid costly mistakes.
Conclusion
Handmade soap making is both fun and rewarding. You can create unique scents and shapes. Personalize your soap with natural ingredients. Feel the joy of crafting something useful. Share gifts with friends and family. Enjoy the satisfaction of using your own creations.
It’s a simple process that anyone can learn. Start small and grow your skills over time. You will save money and reduce waste. Handmade soap is better for your skin and the planet. Dive into this creative hobby and enjoy the benefits.
Happy soap making!