
Imagine harnessing the power of the sun right from your backyard. With DIY solar kits and guides, this dream can become your reality.
You might be wondering how these kits can make a difference in your life and whether they’re worth the investment. As energy costs continue to rise, the idea of generating your own electricity becomes increasingly appealing. But where do you start?
That’s where this guide comes in. We’ll walk you through everything you need to know about DIY solar kits, helping you make an informed decision. Discover how easy it can be to take control of your energy needs and contribute to a greener planet. Keep reading to unlock the secrets of solar power and transform your home into an eco-friendly haven.
What Are Diy Solar Kits?
Solar energy is becoming more popular as people seek sustainable and cost-effective energy solutions. DIY solar kits are designed to help individuals harness the sun’s power without the need for professional installation. These kits make it easier for homeowners to create their own solar power systems, reducing reliance on traditional energy sources. But what exactly are DIY solar kits? Let’s explore.
DIY solar kits are comprehensive packages that provide all the materials needed to set up a solar power system. They are ideal for those who want to install solar panels themselves. These kits are available in various sizes, suitable for different energy needs and budgets.
Components of DIY Solar Kits:
- Solar Panels
- Inverter
- Charge Controller
- Batteries
- Mounting Hardware
- Wiring and Connectors
How Do Diy Solar Kits Work?
The solar panels in the kit capture sunlight and convert it into electricity. This electricity is then sent to an inverter, which changes it from direct current (DC) to alternating current (AC). AC is the type of electricity used in homes. The charge controller manages the power going to the batteries, ensuring they don’t overcharge. This system provides a steady supply of renewable energy for your home.
Benefits Of Using Diy Solar Kits
- Cost-Effective: Installing a solar system yourself can save money on labor costs.
- Customizable: Choose the size and type of system that meets your energy needs.
- Sustainable: Reduce your carbon footprint by using clean energy.
- Energy Independence: Generate your own electricity and rely less on the grid.
Considerations Before Buying
- Energy Needs: Determine how much energy your household uses.
- Budget: Consider the cost of the kit and potential savings on energy bills.
- Installation Skills: Ensure you have the necessary skills or help to install the system.
- Location: Check if your location gets enough sunlight for solar power generation.
Diy Solar Kit Installation Guide
Installing a DIY solar kit can be a straightforward process if you follow the instructions carefully. Here is a simple guide:
- Site Assessment: Choose a location with maximum sunlight exposure.
- Mounting: Secure the solar panels using the provided hardware.
- Wiring: Connect the panels to the inverter and batteries.
- Testing: Check the system for proper functionality.
- Monitoring: Regularly check the system’s performance and maintenance needs.
Benefits Of Diy Solar Kits
DIY solar kits and guides have become increasingly popular among homeowners seeking to embrace sustainable living. These kits offer an accessible entry point into the world of solar energy. Understanding the benefits of DIY solar kits can help you decide if this eco-friendly solution is right for your home. Let’s explore the key advantages that make these kits a smart choice for anyone considering solar power.
Cost Savings
One of the most significant benefits of DIY solar kits is the potential for cost savings. Installing a home solar system yourself can dramatically reduce expenses compared to hiring professional services. Here are a few ways you can save:
- Lower Installation Costs: By undertaking the solar panel installation yourself, you eliminate labor costs.
- Tax Incentives: Many governments offer tax credits for renewable energy solutions, further reducing overall costs.
- Reduced Energy Bills: Solar power savings can significantly cut down your monthly utility expenses.
Consider this basic comparison table:
| Installation Type | Average Cost |
|---|---|
| Professional Installation | $15,000 – $25,000 |
| DIY Solar Kits | $5,000 – $10,000 |
By opting for DIY renewable energy projects, you not only save money but also gain the satisfaction of creating your own green energy alternatives.
Sustainability
DIY solar kits are a cornerstone of sustainable living. They provide a means to reduce your carbon footprint and contribute to a healthier planet. Here’s why sustainability is a key benefit:
- Renewable Energy Solutions: Solar energy is a clean and inexhaustible source of power.
- Eco-Friendly Home Improvements: Installing solar panels is a step towards a greener home.
- Reduced Dependency on Fossil Fuels: Using solar energy decreases reliance on non-renewable resources.
These kits include comprehensive solar energy guides, making it easy to understand and implement energy efficiency tips. By choosing solar, you actively participate in the global movement towards sustainability.
Energy Independence
DIY solar kits offer the promise of energy independence. Imagine no longer being subject to fluctuating electricity prices or unexpected outages. Here’s how DIY solar projects help you achieve energy autonomy:
- Off-Grid Solar Kits: These kits allow you to produce your own electricity, even in remote areas.
- Control Over Energy Production: You decide how much energy you generate and use.
- Resilience Against Power Outages: Home solar systems provide a reliable power source, even during emergencies.
With the freedom to generate your own power, you gain control over your energy future. DIY solar projects empower you to make informed decisions, ensuring a steady supply of electricity while reducing dependency on traditional power grids.
Types Of Diy Solar Kits
DIY solar kits are a fantastic way to harness the sun’s energy without breaking the bank. These kits come with all the components you need to set up your own solar power system. Whether you’re interested in reducing your electricity bills or living off the grid, there’s a DIY solar kit for you. Understanding the different types of solar kits can help you choose the best one for your needs.
Solar Panel Kits
Solar panel kits are the most common type of DIY solar kits. These kits include solar panels, a charge controller, and the necessary mounting hardware. They may also come with an inverter if you plan to use the power for AC appliances. Solar panel kits are perfect for those looking to generate electricity for their homes, RVs, or boats. Here are some features:
- Variety of Sizes: Kits range from small 100-watt panels to larger 400-watt systems.
- Easy Installation: Designed for straightforward setup, often with plug-and-play connections.
- Versatile Applications: Ideal for rooftops, ground mounts, or portable setups.
Consider the table below for a quick comparison:
| Feature | Small Kits | Large Kits |
|---|---|---|
| Power Output | Up to 200 watts | 400 watts and above |
| Best For | RV, small cabins | Homes, larger installations |
Solar Water Heating Kits
Solar water heating kits use the sun’s energy to heat water directly. This is a great way to reduce your reliance on electric or gas water heaters. These kits usually include solar collectors, a storage tank, and a pump. They can be used in homes, pools, or even commercial settings. Key benefits include:
- Energy Savings: Can cut water heating costs by up to 50%.
- Eco-Friendly: Reduces carbon footprint significantly.
- Year-Round Use: Works even in colder climates with proper setup.
Solar water heating systems are efficient and can be installed on rooftops or other sunny areas. These kits make an excellent choice for anyone looking to save money and use renewable energy.
Solar Battery Kits
Solar battery kits are designed to store energy generated by solar panels. This stored energy can be used at night or during power outages. These kits typically include batteries, a charge controller, and wiring. They are perfect for homes looking to go off-grid or ensure backup power. Important aspects include:
- Energy Independence: Store power for use when the sun isn’t shining.
- Backup Power: Reliable during blackouts or emergencies.
- Scalability: Add more batteries as energy needs grow.
Many people choose solar battery kits to gain more control over their energy usage and reduce dependency on the grid.
Key Components Of Solar Kits
Building a solar energy system is a smart way to save on electricity costs. DIY solar kits make this process accessible to everyone. These kits come with detailed guides. Understanding the key components of solar kits is crucial. Each part plays a vital role in harnessing solar power efficiently. Let’s explore these components.
Solar Panels
Solar panels are the heart of any solar energy system. They convert sunlight into electricity. Photovoltaic cells in the panels capture sunlight and generate direct current (DC). The efficiency of these panels depends on the material used. Most panels are made of silicon. There are different types of solar panels:
- Monocrystalline panels: Offer high efficiency.
- Polycrystalline panels: Cost-effective but slightly less efficient.
- Thin-film panels: Lightweight and flexible.
Panel efficiency ranges from 15% to 20%. Choose panels based on your energy needs and budget. Proper placement ensures maximum sunlight exposure. Consider the angle and direction. A table comparing panel types can help:
| Type | Efficiency | Cost |
|---|---|---|
| Monocrystalline | High | Expensive |
| Polycrystalline | Moderate | Affordable |
| Thin-film | Low | Varies |
Inverters
Inverters are essential in a solar system. They convert DC from solar panels to alternating current (AC). AC powers most home appliances. Inverters come in various types:
- String inverters: Connect multiple panels.
- Microinverters: Installed on each panel.
- Power optimizers: Enhance panel performance.
String inverters are cost-effective for large systems. Microinverters offer better efficiency and monitoring. Consider inverter capacity. Ensure it matches your energy output. Look for features like remote monitoring and advanced safety functions. Inverter placement is key. Keep them cool and ventilated. Here’s a quick comparison:
| Type | Advantages | Disadvantages |
|---|---|---|
| String Inverters | Cost-effective | Single point of failure |
| Microinverters | High efficiency | Expensive |
| Power Optimizers | Enhanced performance | Requires additional installation |
Batteries
Batteries store energy for later use. They ensure power availability during cloudy days or at night. Types of batteries vary:
- Lithium-ion: Popular for high efficiency.
- Lead-acid: Cost-effective but heavier.
- Flow batteries: Long lifespan.
Lithium-ion batteries are common in solar kits. They offer longer life and faster charging. Lead-acid batteries are cheaper but require regular maintenance. Capacity matters. Measure it in kilowatt-hours (kWh). Consider battery lifespan and warranty. Proper installation prolongs battery life. Safety is crucial. Prevent overheating and ensure proper ventilation. Here’s a battery comparison:
| Type | Efficiency | Maintenance |
|---|---|---|
| Lithium-ion | High | Low |
| Lead-acid | Moderate | Regular |
| Flow batteries | Variable | Minimal |
Mounting Equipment
Mounting equipment secures solar panels in place. Proper mounting ensures panels receive optimal sunlight. There are different mounting options:
- Roof mounts: Common for homes.
- Ground mounts: Suitable for large areas.
- Pole mounts: Flexible orientation.
Roof mounts are popular for residential use. They save space and are cost-effective. Ground mounts offer easy access and are ideal for larger installations. Pole mounts allow panels to be adjusted for maximum sunlight capture. Choose mounts based on panel type and roof structure. Ensure mounts are durable and corrosion-resistant. Installation should follow safety guidelines. Proper alignment boosts energy production. Here’s a quick look at mounting options:
| Type | Advantages | Considerations |
|---|---|---|
| Roof mounts | Space-saving | Roof integrity |
| Ground mounts | Easy access | Space requirement |
| Pole mounts | Adjustable | Installation cost |
How To Choose A Solar Kit
DIY solar kits are becoming increasingly popular for homeowners looking to reduce energy costs and embrace renewable energy. Choosing the right solar kit can be a daunting task, especially for beginners. It’s crucial to understand your specific energy needs, budget constraints, and the complexity of installation before making a decision. With the right guidance, you can harness the power of the sun efficiently and effectively.
Assessing Your Energy Needs
Before purchasing a solar kit, it’s important to assess your energy needs. This helps in selecting a system that matches your household’s power consumption. Consider the following steps:
- List all electrical appliances in your home.
- Calculate their power usage in watts.
- Estimate daily usage hours for each appliance.
Once you have this information, you can determine the total energy consumption. Here’s a simple table to help with calculations:
Add more rows as needed
| Appliance | Power (Watts) | Usage (Hours/Day) | Total Energy (Wh/Day) |
|---|---|---|---|
| Refrigerator | 150 | 24 | 3600 |
| TV | 100 | 4 | 400 |
These calculations give a clear picture of your energy requirements. Choosing a solar kit that can handle this load ensures efficient energy use.
Budget Considerations
Budget is a critical factor when selecting a solar kit. DIY kits come in various price ranges, so it’s important to identify how much you’re willing to spend. Here are some points to consider:
- Initial Cost: Price of the solar kit itself.
- Maintenance Costs: Regular upkeep and potential repairs.
- Energy Savings: Long-term reduction in electricity bills.
To make a wise investment, balance the initial cost with potential savings. Here’s an example to illustrate potential savings:
Add more rows as needed
| Component | Cost ($) |
|---|---|
| Solar Panels | 200 |
| Inverter | 150 |
| Battery Storage | 300 |
Calculate your return on investment by comparing energy savings over time to these costs.
Installation Complexity
Installation complexity varies among different DIY solar kits. It’s important to assess your technical skills and the complexity of the installation process. Consider these aspects:
- Ease of Assembly: Does the kit come with clear instructions?
- Tools Required: Are special tools or equipment necessary?
- Support Availability: Is technical support available if needed?
Some kits are designed for beginners, while others require advanced skills. Evaluate your comfort level with electrical work. For those new to DIY projects, kits with comprehensive guides and support are beneficial. A simple checklist for assessing installation readiness:
| Task | Readiness |
|---|---|
| Understanding of basic electrical concepts | Yes/No |
| Access to required tools | Yes/No |
| Availability of technical support | Yes/No |
Choosing a kit that matches your skill level and provides adequate support ensures a smooth installation process.
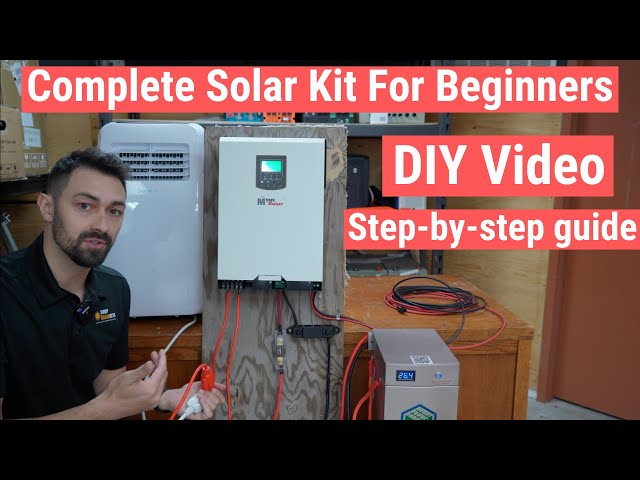
Credit: m.youtube.com
Installation Process
Embracing solar energy with DIY solar kits is a smart choice. It cuts energy costs and helps the environment. The installation process is crucial for efficiency and safety. This guide helps you understand each step clearly. Let’s dive into the essential phases of installing your solar kit.
Preparation Steps
Before starting, gather all necessary tools and materials. This ensures a smooth installation. Here’s a checklist:
- Solar panels
- Inverter
- Batteries
- Mounting brackets
- Wiring kit
- Drill and screws
- Safety gear (gloves, goggles)
Next, evaluate your roof’s condition. Ensure it can support the panels. Check for any damages or weak spots. It’s wise to consult a professional if needed. Calculate the ideal panel placement. Consider sunlight exposure throughout the day. Use a solar calculator for accuracy.
Lastly, review the installation manual. Understand the steps and any safety warnings. If in doubt, seek help from online guides or community forums. Preparation is key to a successful installation.
Mounting The Panels
Mounting the panels requires precision. Start by marking the spots on the roof. Use a measuring tape for accuracy. Ensure the panels face south for maximum sunlight. If your roof angle is not optimal, adjust the mounts.
Drill holes for the mounting brackets. Secure them tightly to avoid movement. Use stainless steel screws to prevent rust. Once the brackets are in place, position the panels. Attach them securely using the provided clamps. Double-check all connections. A loose panel can be dangerous.
| Task | Tool |
|---|---|
| Mark spots | Measuring tape |
| Drill holes | Electric drill |
| Secure panels | Wrench |
Finally, ensure the panels are at the correct angle. Adjust if necessary. Properly mounted panels maximize energy capture.
Wiring And Connections
Wiring is a critical step. It connects the panels to the inverter and battery. Start by reading the wiring diagram. Follow it closely to avoid mistakes. Use the appropriate wire gauge for your system.
Begin by connecting the panels in series or parallel. This depends on your setup. Secure all connections with waterproof connectors. This prevents damage from weather elements. Next, connect the panels to the inverter. Ensure the inverter is compatible with your system.
- Connect panels to inverter
- Connect inverter to battery
- Connect battery to electrical system
Check all connections for tightness. A loose connection can lead to power loss. Use a multimeter to test voltage levels. This ensures everything is working correctly. Proper wiring ensures efficient energy transfer.
Testing The System
Testing is the final step. It confirms everything is functioning well. Start by turning on the inverter. Check the display for any error messages. If all is clear, proceed to test the panels.
Use a multimeter to measure the voltage output. Compare it with the expected output. Slight variations are normal. Monitor the battery charge levels. Ensure they are receiving power from the panels.
Conduct a system-wide test. Turn on appliances connected to the solar system. Observe their performance. A drop in performance indicates an issue. Check all connections and settings.
- Check inverter display
- Measure panel output
- Monitor battery levels
- Test connected appliances
Regular testing ensures longevity and efficiency. Address any issues promptly to maintain optimal performance.
Maintenance Tips
DIY solar kits are an exciting way to harness solar energy. They are cost-effective and environmentally friendly. To ensure your solar kit functions optimally, regular maintenance is essential. Proper care extends the lifespan of your solar panels. It also ensures they perform at their best. Below are some maintenance tips to keep your DIY solar kit in top shape.
Regular Inspections
Inspecting your solar panels regularly is crucial. It helps identify any visible damage or wear. Regular checks can prevent serious issues later. Consider the following steps for a thorough inspection:
- Visual Check: Look for cracks or chips on the surface.
- Connection Review: Ensure all wires and connectors are secure.
- Mounting System: Check that the mounting structure is stable.
Perform these inspections at least every three months. This frequency helps catch problems early. Use a flashlight to check for any hidden issues. A simple inspection can save time and money.
Cleaning Panels
Dirty panels reduce efficiency. Regular cleaning is vital. Dust, bird droppings, and leaves can accumulate. These block sunlight and decrease power output. Here are some tips for cleaning:
- Use Soft Cloths: Avoid abrasive materials that can scratch.
- Water and Soap: Mix mild soap with water for gentle cleaning.
- Rinse Thoroughly: Ensure no soap residue remains on the panels.
Clean your panels every month, especially in dusty areas. Be gentle to avoid damaging the surface. Morning or late afternoon is the best time to clean. Panels are cooler, reducing the risk of cracking from temperature changes.
Monitoring Performance
Monitoring your solar system’s performance ensures it operates efficiently. It helps detect when something’s not right. Use these strategies to track performance:
- Install Monitoring Software: Many kits come with software for real-time data.
- Review Energy Output: Check daily energy production for irregularities.
- Compare with Expected Performance: Use past data to spot trends or issues.
Regular monitoring helps you understand your system’s efficiency. It also aids in determining if maintenance is needed. Anomalies in performance can indicate potential problems. Address these promptly to maintain optimal energy production.

Credit: uk.jackery.com
Common Challenges
Installing a DIY solar kit can be an exciting project. It offers a chance to harness renewable energy and cut electricity bills. Yet, it presents certain obstacles too. Understanding these challenges helps in planning better and avoiding common pitfalls. Here, we discuss some frequent hurdles faced by DIY enthusiasts.
Weather Conditions
Weather can greatly affect solar kit installation and performance. Solar panels need sunlight to produce electricity. Poor weather can reduce energy output.
Consider these weather-related challenges:
- Cloudy Days: Overcast skies can lead to lower energy production.
- Snowfall: Snow can cover panels, blocking sunlight.
- High Winds: Strong winds may damage or dislodge panels.
It’s crucial to plan for these conditions. Here are some tips:
| Weather Condition | Solution |
|---|---|
| Cloudy Days | Use high-efficiency panels. |
| Snowfall | Install panels at an angle to help snow slide off. |
| High Winds | Secure panels with robust mounting systems. |
Local Regulations
Understanding local regulations is essential for a successful solar kit installation. Each area has specific rules about solar energy use.
Common regulatory challenges include:
- Permits: Some regions require permits for solar installations.
- Zoning Laws: Restrictions may exist on where you can place panels.
- Incentives: Availability of tax credits or rebates varies by location.
To navigate these, consider the following steps:
- Contact local authorities to understand permit requirements.
- Check zoning laws to ensure compliance.
- Research available incentives in your area.
Technical Issues
Technical challenges can arise during and after the installation of DIY solar kits. These issues may affect the system’s efficiency and lifespan.
Some common technical issues include:
- Wiring Errors: Incorrect wiring can lead to system failure.
- Inverter Problems: Malfunctioning inverters can disrupt energy conversion.
- Battery Storage: Improper battery setup can reduce storage capacity.
To address these, follow these guidelines:
- Double-check all wiring connections to ensure they are secure.
- Choose a reliable inverter that matches system requirements.
- Install batteries according to the manufacturer’s instructions.
Addressing these technical aspects can help maintain a smooth and efficient solar system.
Resources For Diy Solar
Exploring the world of DIY solar kits can be both exciting and rewarding. Many people enjoy the satisfaction of building their own solar systems from scratch. To help you on this journey, there are numerous resources available. From online guides to community forums and local workshops, you can find a wealth of information to make your DIY solar project a success.
Online Guides
Online guides provide a great starting point for anyone interested in solar power. They offer step-by-step instructions to help you understand and build your own solar panels. These guides are often free and accessible from anywhere.
Many websites specialize in solar energy and offer detailed guides, such as:
- Solar Power Authority: Offers beginner-friendly guides.
- Instructables: Provides user-generated tutorials.
- DIY Solar Power: Features comprehensive project plans.
These resources often include:
- Material lists
- Tools needed
- Safety tips
A well-structured guide can save you time and avoid costly mistakes. They often include videos, diagrams, and photos to support learning.
Online guides are valuable for both beginners and those with more experience. They allow you to learn at your own pace and revisit topics as needed.
Community Forums
Community forums are a fantastic resource for DIY enthusiasts. They provide a platform to share experiences, ask questions, and get advice from others who have completed similar projects.
Some popular forums include:
- Solar Panel Talk: A hub for solar discussions.
- DIY Solar Forum: Focused on do-it-yourself projects.
- Reddit’s Solar DIY: A subreddit for solar enthusiasts.
Benefits of joining these forums:
- Access to expert advice
- Real-world problem-solving tips
- Networking opportunities
Forums allow you to connect with people worldwide who share your interest. You can learn from their successes and challenges, making your project smoother.
Active participation in forums can enhance your learning experience and provide ongoing support throughout your solar journey.
Local Workshops
Local workshops offer hands-on experience, which is invaluable for learning DIY solar. These workshops are often hosted by community centers, educational institutions, or local businesses specializing in renewable energy.
Attending a workshop can provide:
- Practical, hands-on learning
- Direct interaction with experts
- Opportunities to ask questions
Workshops may cover topics such as:
- Solar panel assembly
- System installation
- Maintenance and troubleshooting
They often include demonstrations and group activities to reinforce learning.
To find workshops near you, check with local environmental groups or search online for upcoming events. Participating in a workshop can boost your confidence and deepen your understanding of solar energy.
Future Of Diy Solar
The future of DIY solar is bright and promising. As the world shifts towards renewable energy, more people are seeking ways to harness solar power at home. DIY solar kits and guides are making it easier than ever. These kits allow individuals to install their solar systems with ease. They provide step-by-step instructions, making solar installation accessible to all. With the rising cost of electricity, many are turning to DIY solar as a cost-effective solution. It not only saves money but also contributes to a sustainable future.
Technological Advances
Technology in solar energy is advancing rapidly. These advances are making DIY solar more efficient and user-friendly. Here are some key innovations:
- Improved Solar Panels: Modern panels are more efficient. They convert more sunlight into electricity, even in low-light conditions.
- Smart Inverters: These devices convert DC to AC power. They now come with smart features. Users can monitor energy production in real-time.
- Battery Storage: New batteries store more energy. They are lighter and last longer. This is crucial for uninterrupted power supply.
Here’s a comparison table of traditional vs. modern solar technology:
| Feature | Traditional Solar | Modern Solar |
|---|---|---|
| Panel Efficiency | 15% | 22% |
| Battery Life | 5 years | 10 years |
| Monitoring | Manual | Smart Monitoring |
Growing Popularity
DIY solar kits are gaining traction worldwide. Many factors contribute to this trend:
Firstly, the cost of solar kits has decreased significantly. This makes them accessible to a wider audience. People are more inclined to invest in solar energy.
Secondly, awareness about renewable energy is growing. Many people are now eco-conscious. They prefer sustainable solutions to meet their energy needs.
- Cost-effective installation
- Easy access to guides and tutorials
- Government incentives and rebates
Additionally, social media plays a role. People share their DIY solar success stories online. This inspires others to follow suit. As more households adopt solar, community support increases. It creates a ripple effect, encouraging further adoption.
Environmental Impact
DIY solar has a positive impact on the environment. It helps reduce carbon emissions. By choosing solar, people contribute to a cleaner planet.
Solar energy is renewable. It doesn’t deplete natural resources. Unlike fossil fuels, it doesn’t pollute the air. This makes it a sustainable choice for the future.
Here are some environmental benefits of DIY solar:
- Reduces Carbon Footprint: Solar panels generate clean energy. This helps in lowering carbon emissions.
- Conserves Water: Traditional energy sources use water for cooling. Solar energy does not require water, conserving this vital resource.
- Decreases Air Pollution: Solar panels do not release harmful pollutants. This improves air quality and reduces health risks.
By adopting DIY solar, individuals play a part in protecting the planet. This choice contributes to a greener, more sustainable future for all.
Are Diy Solar Kits Worth It?
In recent years, the quest for energy independence has led many to explore DIY solar kits and guides. With the rising awareness of renewable energy and solar power kits, individuals are asking, “Are DIY solar kits worth it?” These kits provide an opportunity to embrace solar energy at a potentially lower solar panel cost compared to professional installation. For those willing to dive into home solar systems, DIY solar kits might be the key to a sustainable future.
Can I Do A Diy Solar System?
Creating a DIY solar system can be both exciting and challenging. It depends largely on your comfort with basic electrical work and willingness to learn. Here are some considerations:
- Knowledge: Understanding how photovoltaic cells work is crucial. You should also grasp the basics of electrical systems.
- Tools: Essential tools include a soldering iron, wire cutters, and a multimeter.
- Space: You need adequate space for solar panel installation. Ensure your roof or yard receives ample sunlight.
- Regulations: Check local regulations. Some areas have specific codes for off-grid solar systems.
For those with a knack for DIY projects, building a solar system can be rewarding. It requires patience and precision. Benefits include reduced energy bills and contributing to a greener planet.
How Much Does It Cost To Make A Diy Solar Panel?
The solar panel cost for a DIY project varies. It depends on materials and the size of the system. Here’s a rough breakdown:
| Component | Estimated Cost |
|---|---|
| Photovoltaic Cells | $0.50 – $1.00 per watt |
| Inverter | $100 – $300 |
| Mounting Equipment | $50 – $200 |
| Wiring and Connectors | $50 – $150 |
On average, a small DIY panel might cost around $200 to $500. Larger systems increase costs significantly. DIY projects are often cheaper than professional setups. Bulk buying can reduce costs further. Always plan your budget carefully.
How To Make Solar Panel At Home Diy?
Creating a solar panel at home involves several steps. Here’s a simplified guide:
- Gather Materials: Collect photovoltaic cells, a backing board, tabbing wire, and flux pens.
- Assemble Cells: Arrange cells in rows. Use tabbing wire to connect them.
- Solder: Carefully solder connections. Ensure no breaks in the circuit.
- Attach to Board: Secure cells onto the backing board. Use adhesive for stability.
- Seal: Apply a protective layer over cells. Prevents weather damage.
- Wiring: Connect cells to an inverter. Facilitates energy conversion.
- Install: Position panels in sunlight. Optimize angles for maximum efficiency.
Building a solar panel requires attention to detail and safety. Mistakes can lead to inefficiencies. Always double-check your work. With practice, Diy renewable energy projects become easier and more efficient.

Credit: m.youtube.com
Frequently Asked Questions
Can I Buy Solar Panels And Install Them Myself?
Yes, you can buy and install solar panels yourself. Ensure you follow local regulations and safety guidelines. Basic electrical knowledge is crucial. DIY installation can save money but may affect warranties. Consider consulting a professional for complex systems or roof installations to ensure safety and efficiency.
What Is The 20% Rule For Solar Panels?
The 20% rule for solar panels suggests keeping 20% of the roof space clear. This ensures efficient energy production and proper airflow. Leaving this space helps prevent issues like overheating and allows for maintenance access. Always consult professionals for optimal solar panel placement and performance.
Are Diy Solar Kits Worth It?
DIY solar kits can be worth it for cost savings and energy independence. They offer flexibility in installation and customization. Ensure you have the skills for proper setup. Compare costs with professional installations. DIY kits might not suit complex energy needs.
Research thoroughly before purchasing to make an informed decision.
Is It Cheaper To Build Your Own Solar System?
Building your own solar system can be cheaper than hiring professionals. Costs depend on system size, equipment quality, and DIY skills. DIY installation saves labor costs but requires time and technical knowledge. Consider long-term savings and potential incentives. Research thoroughly to ensure cost-effectiveness and efficiency.
Conclusion
Diy solar kits offer a smart way to harness solar power. They provide a great learning experience for beginners and enthusiasts alike. With clear guides, you can easily set up your solar system. These kits save money and reduce your carbon footprint.
Solar energy is clean and renewable, benefiting the planet. Start small, and expand your setup as needed. By using solar kits, you take control of your energy needs. Enjoy the benefits of renewable energy today.