
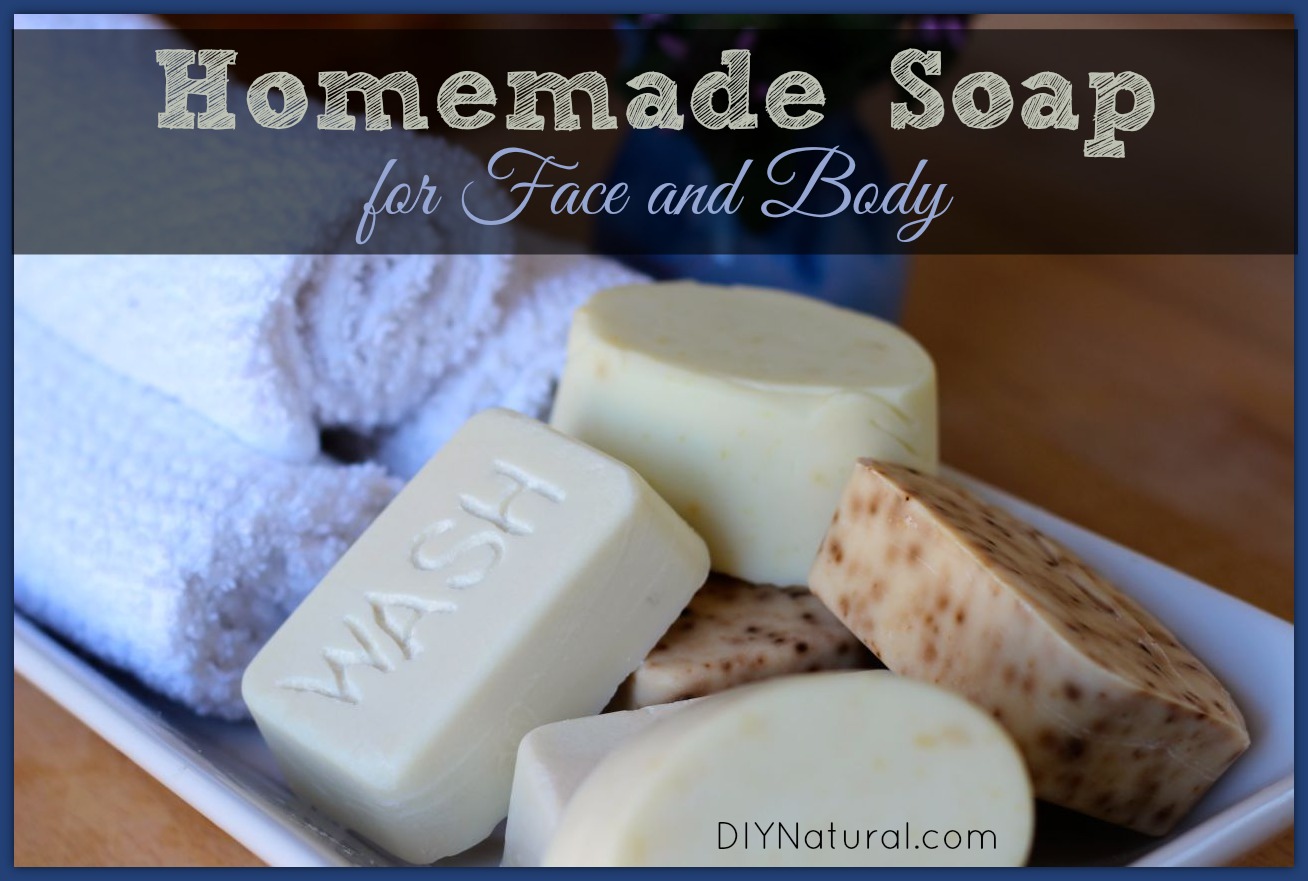
Making handmade soap with natural ingredients is simple and rewarding. It allows you to control what goes into your soap.
Plus, it’s a fun, creative process. Natural ingredients offer skin benefits and peace of mind. You avoid harsh chemicals and embrace nature’s gifts. This guide helps you create soap that suits your needs. Whether you want a soothing lavender bar or an invigorating citrus blend, the possibilities are endless.
Making soap at home is a great way to express creativity. You choose scents, colors, and textures. Handmade soap makes thoughtful gifts too. With basic materials and a little patience, you craft beautiful bars. Join us as we explore the world of natural soap making. Discover joy and fulfillment in every bar you create.
Benefits Of Handmade Soap
Handmade soap crafted with natural ingredients offers numerous benefits that go beyond just cleansing the skin. Unlike commercial soaps filled with synthetic additives, handmade varieties use natural oils, herbs, and essential oils. These elements nourish the skin and provide a gentle yet effective cleaning experience. Making soap at home allows you to choose ingredients that suit your skin type and preferences. Let’s explore some of the key benefits of using handmade soap.
Skin Health
Handmade soap is a boon for skin health. It contains glycerin, a natural humectant that attracts moisture to the skin. This makes it perfect for individuals with dry or sensitive skin. Commercial soaps often remove glycerin, leading to dryness.
Natural oils like olive, coconut, and almond found in handmade soap deliver essential nutrients to the skin. These oils are rich in vitamins and antioxidants that promote skin repair and rejuvenation.
- Olive Oil: Packed with antioxidants, it helps reduce skin aging.
- Coconut Oil: Provides moisture and helps prevent skin infections.
- Almond Oil: Soothes irritation and reduces puffiness.
Essential oils such as lavender or tea tree add therapeutic benefits. Lavender calms the skin, while tea tree oil fights acne-causing bacteria. Handmade soap does not contain harsh chemicals or artificial fragrances, reducing the risk of allergic reactions.
Below is a table that highlights the skin benefits of natural oils commonly used in handmade soap:
| Oil Type | Skin Benefits |
|---|---|
| Olive Oil | Anti-aging, moisturizing |
| Coconut Oil | Antimicrobial, hydrating |
| Almond Oil | Soothing, anti-inflammatory |
Environmental Impact
Handmade soap positively impacts the environment. It uses biodegradable ingredients which break down naturally without harming ecosystems. This reduces pollution and contributes to a cleaner planet.
Most handmade soaps are packaged sustainably. Makers often use recyclable or reusable materials, minimizing waste compared to plastic-wrapped commercial soaps.
- Biodegradable Ingredients: Reduce environmental pollution.
- Sustainable Packaging: Promotes eco-friendly practices.
Making soap at home reduces carbon footprint. It cuts down on transportation emissions associated with mass-produced soap. Many commercial soaps contain palm oil, often linked to deforestation. Handmade soap offers alternatives, using oils that are sustainably sourced.
Supporting local artisans who make handmade soap also fosters community well-being. It encourages ethical production methods and supports small businesses that prioritize the environment.
Choosing handmade soap is a step towards a greener lifestyle. It aligns personal care with environmental responsibility, making it a conscious choice for eco-conscious individuals.

Credit: eccentricitiesbyjvg.com
Essential Ingredients
Handmade soap with natural ingredients is a rewarding and creative activity. Understanding the essential ingredients is key to crafting a successful batch. These ingredients not only define the quality of your soap but also determine its characteristics. Let’s delve into the primary components that make up a handmade soap recipe, focusing on oils and fats, lye, and additives.
Oils And Fats
Oils and fats form the base of any natural soap making process. They are crucial in the saponification process, where they react with lye to create soap. Choosing the right oils can affect the soap’s hardness, lather quality, and moisturizing properties.
- Coconut Oil: Known for creating a rich lather.
- Olive Oil: Adds moisture and is gentle on the skin.
- Palm Oil: Provides hardness and longevity to the soap bar.
For those interested in organic soap ingredients, consider using oils like almond oil or jojoba oil. These can offer extra nourishment and benefits for the skin.
| Oil Type | Benefits |
|---|---|
| Coconut Oil | Rich lather, cleansing |
| Olive Oil | Moisturizing, gentle |
| Palm Oil | Hardness, durability |
Experimenting with different oils can enhance your diy soap crafting experience, offering unique textures and fragrances.
Lye
Lye is an essential component in the cold process soap method. It acts as a catalyst in the saponification process, transforming oils into soap. Though it may sound intimidating, following lye safety tips ensures a safe crafting experience.
Here are some key safety tips when working with lye:
- Always wear gloves and goggles.
- Mix lye in a well-ventilated area.
- Slowly add lye to water, never the reverse.
Understanding the role of lye helps in achieving the perfect balance in your soap. Proper handling makes the difference between a successful batch and a mishap.
Lye’s role in soap making is crucial, ensuring the oils turn into soap and not just a greasy mixture. Respecting its power and potential hazards is vital for all soap making supplies.
Additives
Additives bring creativity and personalization to your handmade soap recipe. They enhance the soap’s appearance, fragrance, and therapeutic properties. Common additives include essential oils for soap, herbs, and clays.
Popular herbal additives for soap include:
- Lavender: Calming scent and skin-soothing properties.
- Rosemary: Invigorating aroma and antibacterial qualities.
- Oatmeal: Gentle exfoliant and soothing for sensitive skin.
Incorporating essential oils not only adds fragrance but also therapeutic benefits. For instance, tea tree oil can offer antibacterial effects, while peppermint oil provides a refreshing tingle.
Additives allow for endless possibilities in soap crafting. They enable customization, making each bar unique and tailored to personal preferences.
Safety Precautions
Creating handmade soap using natural ingredients is a rewarding hobby. It allows you to tailor each batch to your preferences. But, it’s essential to prioritize safety. Soap-making involves chemicals that can be dangerous if mishandled. Following safety precautions protects you and ensures a successful soap-making experience.
Protective Gear
Wearing the right protective gear is crucial in soap-making. Protective gear shields you from potential hazards. Here are some essentials:
- Gloves: Choose durable rubber or latex gloves. They protect your hands from lye burns.
- Eye protection: Safety goggles keep your eyes safe from splashes and fumes.
- Apron: A sturdy apron prevents spills on your clothes.
- Mask: A mask minimizes inhalation of fumes during the mixing process.
Additionally, ensure your workspace is well-ventilated. Ventilation reduces the concentration of fumes, making the environment safer. Always have a first aid kit nearby. It should contain items like burn ointment and bandages. Preparation is key to handling any accidents swiftly.
Handling Lye
Lye is a critical ingredient in soap-making. It’s highly caustic and requires careful handling. Here’s how to manage it safely:
- Measure accurately: Use precise scales. Incorrect amounts can lead to unsafe soap.
- Add lye to water: Never the other way around. This prevents explosive reactions.
- Stir slowly: Gradual mixing avoids splashes and fumes.
- Use heat-resistant containers: Lye heats up when mixed with water. Containers should withstand high temperatures.
- Store safely: Keep lye in a secure, labeled container away from children and pets.
Ensure you’re in a well-ventilated area when working with lye. Avoid inhaling fumes directly. If you spill lye, clean it immediately using vinegar. Vinegar neutralizes lye, reducing its caustic effects. Always remain focused and avoid distractions. This keeps you aware of your surroundings and reduces risks.
Credit: diynatural.com
Basic Soap-making Methods
Making handmade soap with natural ingredients is a rewarding hobby. It allows you to create unique, skin-friendly products at home. The basic soap-making methods include Cold Process, Hot Process, and Melt and Pour. Each method has its own charm and benefits. Let’s explore these techniques to understand which suits your needs best.
Cold Process
The Cold Process is a popular method in natural soap making. It involves combining oils and lye to create soap through a process called saponification. This method allows you to customize your soap with various oils, essential oils for soap, and other natural additives.
Here’s a simple Cold Process Soap Tutorial:
- Mix the Lye: Combine lye with water. Always add lye to water, not the other way around.
- Heat Oils: Melt and mix your chosen oils.
- Combine and Blend: Slowly add the lye mixture to the oils. Blend until it reaches ‘trace’.
- Additives: Stir in essential oils or other additives.
- Mold: Pour the mixture into molds and let it harden for 24-48 hours.
- Cure: Allow the soap to cure for 4-6 weeks for optimal results.
The Cold Process allows for greater creativity with handmade soap recipes. It requires time and patience but results in a long-lasting bar of soap. This method is ideal for those who prefer a more traditional approach to soap making.
Hot Process
The Hot Process method is similar to the cold process but involves cooking the soap. This technique speeds up the saponification process, allowing the soap to be used sooner. The hot process soap benefits include a more rustic appearance and faster curing time.
Here’s how to make soap using the Hot Process:
- Prepare Ingredients: Measure oils, lye, and water.
- Mix: Combine lye with water and mix with the melted oils.
- Cook: Place the mixture in a slow cooker. Cook on low heat, stirring occasionally.
- Check for Gel Phase: The soap will go through a gel phase. This is normal and indicates saponification.
- Add Fragrance: After cooking, add essential oils and any desired additives.
- Mold and Cool: Pour the mixture into molds. Let it cool and harden.
This organic soap method produces soap with a rustic look and a shorter curing time. It’s perfect for those who want a quicker turnaround time on their soap projects.
Melt And Pour
The Melt and Pour method is the simplest soap-making technique. It’s perfect for beginners and requires no handling of lye. You simply melt a pre-made soap base and pour it into molds. This method is ideal for experimenting with different DIY soap ingredients.
Follow these Melt and Pour Soap Instructions:
| Step | Description |
|---|---|
| Melt | Cut the soap base into cubes and melt it in a microwave or double boiler. |
| Add | Mix in essential oils for soap and colorants. |
| Pour | Pour the melted soap into molds. |
| Harden | Let the soap cool and harden completely. |
This method is quick and easy, with glycerin soap benefits like being ready to use immediately. It’s a great choice for creative projects and making personalized gifts.
Choosing Natural Scents
Crafting handmade soap is a delightful journey, especially when using natural ingredients. The allure of homemade soap lies not only in its purity but also in its personalized touch. A key aspect of this customization is choosing natural scents. Scents define the character and charm of your soap. They can evoke memories, uplift moods, or simply offer a refreshing cleanse. Let’s explore how to select the perfect natural scents for your soap-making adventure.
Essential Oils
Essential oils are nature’s aromatic gift. They offer a wide range of scents extracted from plants. These oils are known for their therapeutic properties. Some popular choices include:
- Lavender: Calming and soothing, ideal for relaxation.
- Lemon: Fresh and invigorating, perfect for a morning boost.
- Peppermint: Cool and refreshing, great for revitalizing.
To help you decide, here’s a simple table showcasing essential oils and their benefits:
| Essential Oil | Benefit |
|---|---|
| Lavender | Promotes relaxation |
| Lemon | Boosts energy |
| Peppermint | Enhances focus |
Considerations when using essential oils:
- Use sparingly, they are potent.
- Blend different oils for unique scents.
- Check for allergies or skin sensitivities.
Essential oils provide a natural scent and add a therapeutic touch to your soap.
Fragrance Oils
Fragrance oils are synthetic compounds designed to mimic natural scents. They offer a broader range of aromas compared to essential oils. Some popular fragrance oils include:
- Vanilla: Sweet and comforting.
- Apple: Crisp and refreshing.
- Rose: Floral and romantic.
Here’s a comparison table to illustrate the differences:
| Fragrance Oil | Characteristic |
|---|---|
| Vanilla | Warm and sweet |
| Apple | Fresh and fruity |
| Rose | Elegant and floral |
Factors to consider with fragrance oils:
- They may not offer therapeutic benefits.
- More stable in soap formulations.
- Can be mixed to create custom scents.
Fragrance oils provide versatility and a wide array of scent options for your soap creations.

Credit: lovelygreens.com
Coloring Your Soap
Coloring your soap is a delightful part of the natural soap-making process. It allows you to express creativity and personalize your bars. Using natural ingredients for coloring not only enhances the soap’s appearance but also keeps it eco-friendly and safe for the skin. Whether you are crafting cold process soap or glycerin soap, understanding the right colorants can elevate your soap crafting techniques. Let’s explore how you can use natural colorants and micas and dyes for your handmade soap recipe.
Natural Colorants
Natural colorants are a fantastic choice for those interested in eco-friendly soap making. They offer a wide range of hues and are derived from plants, minerals, and other natural sources. Using these organic soap colorants ensures your soap remains gentle and free from synthetic additives.
Here are some popular natural colorants for your soap:
- Turmeric: Provides a warm, golden hue and is rich in antioxidants.
- Spirulina: Gives a vibrant green color and is packed with nutrients.
- Activated Charcoal: Offers a deep black shade and is known for detoxifying properties.
- Beetroot Powder: Delivers a soft pink or red tint and is high in vitamins.
Using natural colorants also aligns with the use of essential oils for soap. They work well with natural fragrances for soap, creating an all-natural product. When preparing your DIY soap ingredients, consider blending colorants to achieve unique shades. Here’s a simple table to guide you on the usage rates for different natural colorants:
| Colorant | Usage Rate (per pound of soap) |
|---|---|
| Turmeric | 1/2 to 1 teaspoon |
| Spirulina | 1/2 to 1 teaspoon |
| Activated Charcoal | 1/2 to 1 teaspoon |
| Beetroot Powder | 1 to 2 teaspoons |
Micas And Dyes
Micas and dyes provide vibrant and consistent colors for your handmade soap. While they are not completely natural, they are widely used in soap crafting techniques due to their stability and ease of use. Micas are derived from natural minerals and come in various shimmering shades, adding a touch of sparkle to your soap.
Here’s why micas and dyes are popular in soap making:
- Variety: A broad spectrum of colors, including metallic and pearlescent finishes.
- Stability: Colors remain vibrant without fading over time.
- Ease of Use: Blend easily with other soap ingredients and essential oils for soap.
When using micas, it’s important to mix them well with a small amount of oil before adding to your soap mixture. This ensures even distribution. Dyes, on the other hand, are water-soluble and ideal for glycerin soap. They offer bright, clear colors, making them perfect for intricate designs.
For those interested in creating bold, eye-catching soaps, micas and dyes offer a wide palette to choose from. While they may not be as natural as plant-based colorants, they provide unmatched vibrancy and are a staple in many handmade soap recipes.
Molding And Cutting
Creating handmade soap with natural ingredients is a rewarding experience. The journey from mixing ingredients to the final product is fascinating. Two crucial steps in this process are molding and cutting. These steps influence the soap’s final appearance and usability. Getting them right ensures that your soap not only looks good but also lasts longer. Let’s explore the best practices for molding and cutting your soap.
Types Of Molds
Choosing the right mold is essential for shaping your soap. Different molds offer unique benefits and aesthetics. Here are some popular options:
- Silicone Molds: These are flexible and easy to use. They come in various shapes and sizes. Silicone molds allow easy removal of the soap without damage.
- Wooden Molds: Wooden molds are sturdy and provide a classic look. They often have a liner to prevent the soap from sticking. This type of mold is great for larger batches.
- Plastic Molds: These are durable and inexpensive. They are available in many designs and are ideal for beginners.
Here’s a quick comparison of mold types to help you decide:
| Type of Mold | Pros | Cons |
|---|---|---|
| Silicone | Flexible, easy to clean | May need support for larger molds |
| Wooden | Sturdy, traditional look | Requires a liner |
| Plastic | Durable, affordable | Limited flexibility |
Cutting Techniques
After the soap hardens, cutting it properly is key. The right technique ensures uniform pieces and enhances the soap’s appearance.
- Manual Cutting: Use a sharp knife or soap cutter. Manual cutting gives you control over size and shape. Ensure straight cuts for uniform bars.
- Wire Cutter: A wire cutter is efficient for straight lines. It’s excellent for large batches, providing even slices.
- Miter Box: For precise angles, a miter box is useful. It guides the knife or cutter, ensuring consistent angles and sizes.
For best results, follow these tips:
- Temperature: Cut soap at the right temperature. Too soft, and it may crumble. Too hard, and it may crack.
- Timing: Allow soap to cure slightly before cutting. This helps in achieving clean cuts.
- Practice: Practice makes perfect. Experiment with different techniques to find what works best for you.
Curing And Storing
Making handmade soap with natural ingredients is a rewarding experience. You’ve carefully selected herbs, oils, and scents to craft a product that’s gentle on the skin and environmentally friendly. Now, understanding the curing and storing process is crucial. Proper curing ensures your soap hardens and lasts longer, while effective storage maintains its quality. Let’s explore these essential steps.
Curing Process
The curing process is vital for handmade soap. It allows the soap to harden and improves its longevity. Here are the steps involved:
- Duration: Curing typically takes 4 to 6 weeks. This period allows water to evaporate and the soap to harden.
- Air Circulation: Place soaps on a rack or shelf. Ensure good air circulation around each bar.
- Temperature: Store in a cool, dry place. Avoid direct sunlight, which can affect the soap’s scent and color.
- Arrangement: Arrange soap bars with space between them. This prevents sticking and helps even curing.
Monitor the soap regularly. Check for any signs of uneven curing or discoloration. Adjust the environment if necessary.
| Factor | Details |
|---|---|
| Duration | 4 to 6 weeks |
| Temperature | Cool and dry |
| Air Circulation | Good airflow |
Storage Tips
Proper storage maintains the quality and longevity of your handmade soap. Follow these tips:
- Containers: Use breathable containers. Cardboard boxes or wooden crates are ideal.
- Location: Choose a cool, dry area. Avoid damp places which can cause mold.
- Labeling: Clearly label each batch. Note the production date and ingredients.
- Stacking: Do not stack soap bars directly. Use paper or cloth between layers.
Regularly check your stored soap. Look for any changes in texture or scent. Rotate the stock to ensure older bars are used first.
| Tip | Details |
|---|---|
| Containers | Breathable options |
| Location | Cool and dry |
| Labeling | Production date and ingredients |
| Stacking | Separate with paper or cloth |
How Do You Make Soap With Only Natural Ingredients?
Creating soap at home using natural ingredients is both rewarding and beneficial. This process allows you to know exactly what goes into your soap, ensuring it’s free from harmful chemicals. By choosing organic soap ingredients and essential oils for soap, you can craft a product that not only cleanses but also nourishes the skin. Whether you’re interested in making liquid soap, a simple 3-ingredient bar, or using a soap base, natural soap making offers a variety of options that cater to every need.
How To Make Liquid Soap At Home With Natural Ingredients?
Crafting liquid soap at home can be a fun and simple process. A homemade liquid soap recipe usually begins with a few basic ingredients. You’ll need water, a natural oil like coconut or olive, and potassium hydroxide (KOH) to saponify the oils.
To start, measure your ingredients carefully:
- 1 cup water – distilled is best for purity.
- 3/4 cup coconut oil – known for its lathering properties.
- 1/4 cup olive oil – for moisturizing benefits.
- 2 tablespoons potassium hydroxide – the essential saponifying agent.
Follow these steps:
- Heat the oils gently until they melt and blend.
- In a separate bowl, carefully mix the KOH with water. This should be done slowly to avoid splashing.
- Combine the oil mixture with the KOH solution, stirring until they thicken.
- Once the mixture reaches a thick consistency, let it cool.
- Optional: Add essential oils for soap for fragrance.
Transfer your liquid soap into a pump bottle. This natural soap making method results in a gentle, skin-friendly cleanser.
How To Make Soap With 3 Ingredients?
For a simple soap recipe, you only need three basic ingredients. This method is perfect for beginners eager to try DIY soap tutorials.
You’ll need:
- 1 pound Glycerin Soap Base – the key ingredient for easy soap making.
- 10-15 drops of essential oils – for fragrance and therapeutic benefits.
- Natural colorant – such as turmeric or beetroot powder for a touch of color.
Steps to make soap:
- Cut the glycerin soap base into small cubes.
- Melt the cubes using a microwave or double boiler.
- Once melted, stir in the essential oils and colorant.
- Pour the mixture into soap molds.
- Allow it to cool and harden for several hours.
This melt and pour soap method is straightforward and quick, resulting in a beautiful, customized soap with minimal effort.
How To Make Soap With Soap Base?
Using a soap base simplifies the soap-making process significantly. It allows you to focus on personalization rather than the technical aspects of cold process soap.
To begin, gather these items:
- 1 pound soap base – choose from options like goat milk, shea butter, or glycerin.
- Essential oils – select based on desired fragrance and properties.
- Herbs or exfoliants – like oatmeal or lavender for added texture.
Here’s how to make it:
- Chop the soap base into small chunks.
- Melt the chunks using a microwave or double boiler.
- Add essential oils and herbs once the base is liquid.
- Pour into molds quickly before it begins to set.
- Let the soap cool and harden completely.
With this handmade soap recipe, you can explore creativity in herbal soap making, making each bar unique and tailored to your preference.
Frequently Asked Questions
How Do You Make Soap With Only Natural Ingredients?
Start by melting natural oils like coconut or olive in a pot. Mix in water and lye. Stir until combined, then add essential oils for fragrance. Pour into molds and let it harden for 24 hours. Remove and cure for 4-6 weeks before using for best results.
What Are The 3 Main Ingredients In Soap?
Soap mainly contains oils or fats, water, and an alkali like sodium hydroxide or potassium hydroxide. These ingredients work together to create a cleansing and lathering effect. The oils or fats react with the alkali in a process called saponification, resulting in soap formation.
Is It Possible To Make Soap Without Chemicals?
Soap naturally contains chemicals like oils and lye. Homemade soap uses natural ingredients, minimizing synthetic additives. Use organic oils and plant-based lye for a more natural product. Choose essential oils and herbs for fragrance and color. This approach ensures a gentle soap with fewer artificial chemicals.
What Do Amish Use To Make Soap?
Amish people typically use natural ingredients to make soap. Common ingredients include lye, animal fats, and essential oils. They focus on simple, traditional methods to create gentle and effective soaps. These soaps are often handcrafted, ensuring a high-quality, natural product.
Conclusion
Creating handmade soap is simple and rewarding. Natural ingredients ensure gentle care for your skin. The process allows creativity and personalization. Use scents and colors that you love. Homemade soap makes perfect gifts too. Impress friends and family with your creations.
You control the quality and purity of your soap. Enjoy the benefits of a natural approach to skincare. Start today and explore new ideas. Happy soap-making journey awaits. Keep experimenting and learning. Your skin will thank you.