Making handmade liquid soap is simpler than it seems. You can create unique, gentle soaps right at home.
Liquid soap is a versatile and rewarding craft. It allows you to customize scents, colors, and ingredients to suit your preferences. Crafting your own soap means you know exactly what’s in it—perfect for those with sensitive skin or allergies. The process involves mixing oils with a special solution to form a soap base.
This can then be personalized with fragrances and colorants. Plus, it’s a sustainable choice; homemade soaps reduce plastic use and chemical exposure. With a bit of patience and practice, you can create luxurious soaps that make great gifts or personal treats. Ready to dive into the world of soap-making? Let’s get started!
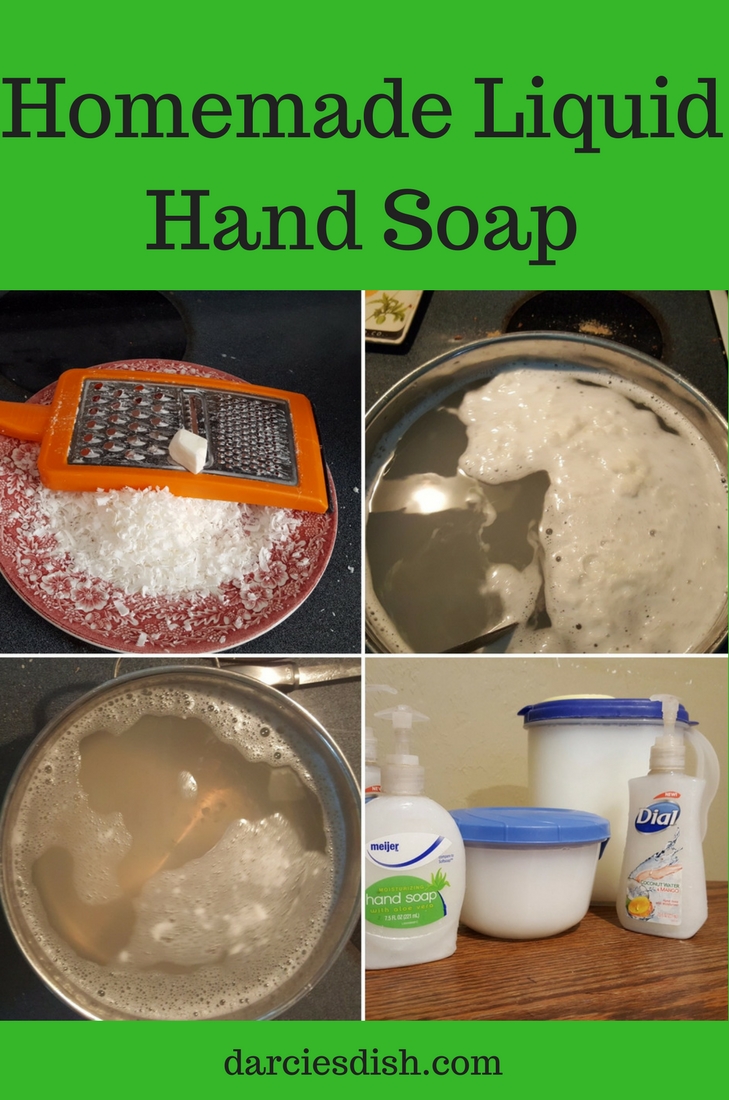
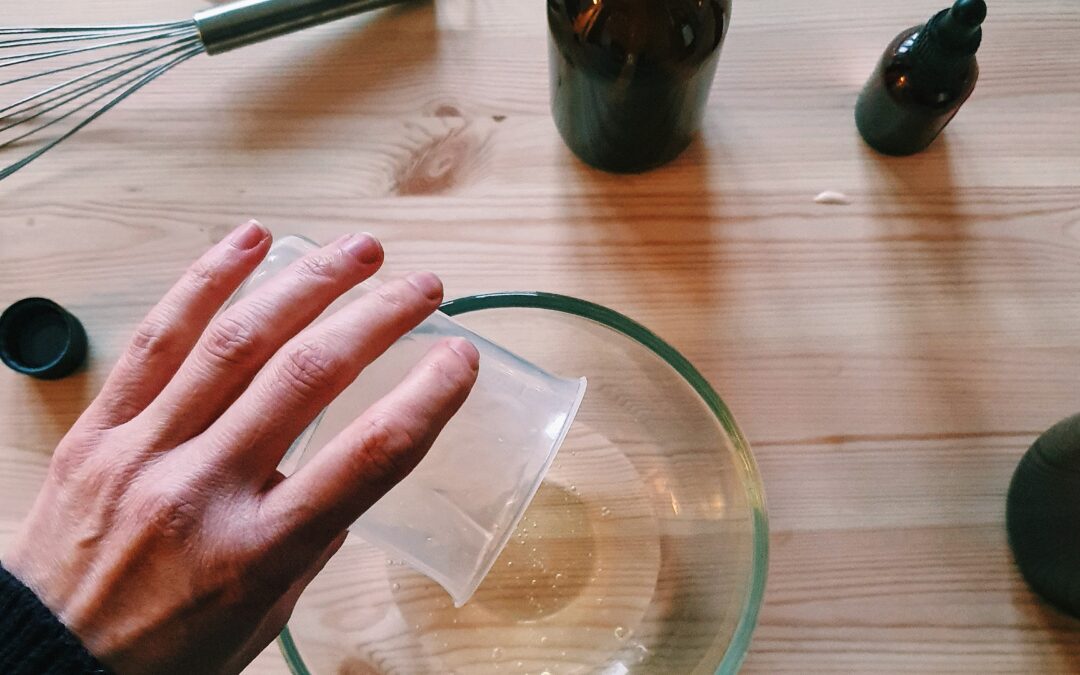
Credit: www.darciesdish.com
Ingredients Needed
Creating handmade liquid soap at home is both rewarding and fun. It allows you to customize your soap with preferred scents and colors. Before diving into the process, understanding the essential ingredients is crucial. Each component plays a unique role in soap making, ensuring your final product is both effective and pleasing. Let’s explore the key ingredients needed for crafting your own liquid soap.
Base Oils
Base oils are the foundation of your soap. They determine the soap’s texture, lather, and moisturizing properties. Common base oils include:
- Olive Oil: Known for its nourishing qualities. It creates a gentle soap perfect for sensitive skin.
- Coconut Oil: Provides excellent lather and cleansing properties.
- Castor Oil: Enhances the soap’s lather and adds conditioning.
- Sunflower Oil: Rich in vitamin E, offering skin benefits and a smooth texture.
Using a combination of these oils can balance the soap’s characteristics. Here’s a simple table to understand their benefits:
| Oil Type | Benefits |
|---|---|
| Olive Oil | Moisturizing, gentle |
| Coconut Oil | Good lather, cleansing |
| Castor Oil | Conditioning, enhances lather |
| Sunflower Oil | Vitamin E rich, smooth texture |
Lye
Lye is a crucial ingredient in soap making. It acts as a catalyst that transforms oils into soap through saponification. While handling lye, safety is a priority. Use gloves and goggles to protect your skin and eyes. Here are some key points about lye:
- Form: Typically available as sodium hydroxide.
- Role: Ensures the soap hardens properly.
- Safety: Always add lye to water, not water to lye to prevent splashes.
Understanding the chemistry of lye can make soap making less intimidating. It’s essential to measure accurately and follow guidelines for a successful batch.
Water
Water plays a significant role in the soap making process. It dissolves the lye and combines with oils to form the soap mixture. Distilled water is recommended to avoid impurities that can affect the soap’s quality. Here’s why water is important:
- Purity: Distilled water ensures no minerals interfere with the soap.
- Mixing: Properly dissolves lye to create a smooth mixture.
Using the right amount of water is crucial. Too much can make the soap too soft, while too little can prevent proper saponification. Typically, water makes up about 20% of the total weight of the soap mixture.
Fragrance Oils
Fragrance oils add a pleasant scent to your soap. They come in a variety of options, allowing you to customize the aroma. Here’s how to use fragrance oils effectively:
- Types: Choose from floral, fruity, or herbal scents.
- Concentration: Typically added at 1-2% of the total soap weight.
- Stability: Ensure the fragrance oil is suitable for soap to prevent fading.
Fragrance oils can enhance the soap experience, making it enjoyable to use. Choose scents that resonate with you or match the intended purpose of the soap.
Colorants
Colorants give your soap an appealing look. They can range from natural options to synthetic dyes. Choosing the right colorant enhances the soap’s visual appeal:
- Natural: Clays, spices, and plant powders offer subtle hues.
- Synthetic: Micas and liquid dyes provide vibrant colors.
When using colorants, ensure they are safe for skin application. A small amount goes a long way, typically added at less than 1% of the total weight. Mix thoroughly to achieve even distribution.
Safety Precautions
Making DIY liquid soap at home can be a fun and rewarding experience. Yet, it requires attention to safety. Handling soap-making supplies like lye can be risky if not done properly. Safety precautions are crucial to ensure a smooth and safe soap-making process. Here, we discuss essential safety measures to follow, ensuring that your liquid soap making adventure is both enjoyable and safe.
Protective Gear
When engaging in the art of soap-making, using the right protective gear is essential. Wearing protective clothing can prevent accidental burns or exposure to harmful substances.
- Gloves: Choose chemical-resistant gloves to protect your hands from lye and other soap ingredients.
- Goggles: Safety goggles shield your eyes from splashes.
- Apron: A sturdy apron safeguards your clothing from spills.
A table showcasing the recommended protective gear:
| Item | Purpose |
|---|---|
| Gloves | Protects hands from chemicals |
| Goggles | Prevents eye exposure |
| Apron | Shields clothing from spills |
Invest in quality protective gear to ensure a safe soap-making environment. This gear acts as your first line of defense when working with natural soap ingredients and essential oils for soap.
Proper Ventilation
Proper ventilation is key in liquid soap making, especially when handling lye. Lye safety precautions include ensuring the workspace is well-ventilated to disperse fumes.
Here are steps to ensure good ventilation:
- Work near an open window or door to allow fresh air circulation.
- Use a fan to help move air and reduce fume concentration.
- Avoid confined spaces; large areas are preferable for soap-making techniques.
If possible, an outdoor setting is ideal. Ventilation reduces the risk of inhaling harmful fumes, making your soap-making process safer. Remember, even with proper ventilation, protective gear is still necessary.
Handling Lye Safely
Lye is a critical component in the cold process soap method. Yet, it’s also caustic and requires careful handling. Understanding how to handle lye safely is crucial.
Follow these guidelines for lye safety:
- Read all instructions carefully before use.
- Measure lye accurately using a dedicated lye-safe container.
- Always add lye to water, not water to lye, to prevent dangerous reactions.
When mixing lye, patience is key. Allow the mixture to cool in a safe place before proceeding with your handmade soap recipe. Proper handling of lye ensures your liquid soap making experience is both safe and successful.
Remember, handling lye with care is vital for creating beautiful and safe glycerin in soap. With these precautions, your soap-making journey will be as safe as it is satisfying.
Equipment Required
Creating handmade liquid soap is a rewarding endeavor that allows you to customize your soap with unique scents and ingredients. To ensure a smooth soap-making process, having the right equipment is crucial. The necessary tools not only help in achieving the desired consistency but also ensure safety and precision in measurements. Here, we break down the essential equipment needed for making handmade liquid soap.
Mixing Tools
Mixing tools are vital for combining ingredients smoothly. A stick blender is often the preferred choice. It ensures a uniform blend without much effort.
- Stick Blender: Efficient for mixing lye and oils.
- Stainless Steel Spoon: Useful for initial stirring.
- Whisk: Handy for light mixing tasks.
Using a stick blender speeds up the emulsification process. It reduces the time needed to bring your mixture to trace, which is the point where the mixture thickens enough to leave a trail when drizzled over itself. Make sure all tools are clean and dry. This prevents contamination and ensures your soap has the best quality and longevity.
Containers
Containers play a key role in soap making. They hold your mixtures at various stages. Choose the right containers for safe and effective soap making.
- Heatproof Container: For mixing lye solution.
- Mixing Bowls: Preferably stainless steel or tempered glass.
- Storage Bottles: For the finished product.
A heatproof container is essential for mixing lye as it can get very hot. Ensure it is resistant to high temperatures. Mixing bowls should be non-reactive to prevent unwanted chemical reactions. For storage, use bottles with tight seals to maintain the soap’s freshness and prevent leakage.
Scale
Precision in measurements is key in soap making. A digital scale ensures accurate measurements of ingredients.
- Digital Scale: For precise ingredient measurement.
- Capacity: At least 5 kg for flexibility.
- Unit Conversion: Should include grams and ounces.
Using a scale prevents errors in ingredient proportions. This is crucial for achieving the right soap consistency and safety. Ensure the scale is calibrated correctly. Always measure your ingredients in a stable environment to maintain accuracy.
Thermometer
A thermometer helps monitor temperatures crucial for soap making. Temperature control affects the texture and quality of your soap.
- Digital Thermometer: Provides quick and accurate readings.
- Range: Should cover from 0°C to 100°C (32°F to 212°F).
- Probe Type: Long probe for deeper readings.
Maintaining the right temperature is essential for saponification, the chemical reaction that turns fats into soap. A digital thermometer provides precise readings. This ensures both lye and oils are at the optimal temperature before mixing. Avoid using mercury thermometers as they can break and contaminate your mixture.
Preparing The Lye Solution
Creating handmade liquid soap is both an art and a science. Preparing the lye solution is a critical step in this process. It involves careful measurement, mixing, and cooling. Each step requires precision and patience. Mistakes can lead to unsatisfactory results or safety hazards. Let’s dive into the details to ensure a smooth and successful soap-making experience.
Measuring Lye
Accurate measurement of lye is crucial. Too much or too little can affect the soap’s quality. Here’s how to measure lye correctly:
- Use a digital scale for precision. A slight error can lead to a failed batch.
- Wear protective gear like gloves and goggles. Lye can be dangerous if it comes in contact with skin.
- Choose a well-ventilated area to measure. Lye emits fumes that can be harmful if inhaled.
Follow these steps to measure lye:
- Place a clean, dry container on the scale.
- Reset the scale to zero.
- Slowly pour the lye into the container until you reach the required weight.
| Safety Gear | Measurement Tools |
|---|---|
| Gloves | Digital Scale |
| Goggles | Dry Container |
Mixing With Water
Mixing lye with water requires caution. The reaction can be vigorous and release heat. Here’s how to mix safely:
- Use cold water to minimize the heat produced during the reaction.
- Add lye to water, never water to lye. This prevents splashes and excessive heat.
- Stir gently with a stainless steel spoon. Avoid inhaling the fumes.
Steps for mixing lye and water:
- Fill a heat-resistant container with the required amount of cold water.
- Slowly add the lye to the water, stirring continuously.
- Ensure the lye dissolves completely before proceeding.
It’s important to note the following:
- Do not use aluminum containers. They can react with lye.
- Work outside or in a ventilated area to avoid inhaling fumes.
Cooling Process
The cooling process allows the lye solution to reach a safe temperature for soap making. Here’s how to cool efficiently:
- Set the container aside in a safe place. Away from children and pets.
- Monitor the temperature with a thermometer. Aim for room temperature.
- Do not rush this step. Cooling can take 30 minutes or more.
Steps to cool the lye solution:
- Place the container in a safe, undisturbed area.
- Check the temperature every 10 minutes.
- Wait until the solution is cool enough to touch.
Things to remember:
- Patience is key. Rushing can lead to unsafe temperatures.
- Keep the area secure. Ensure no accidental spills occur.
Combining Ingredients
Creating handmade liquid soap is an exciting endeavor. Combining ingredients is a critical step that requires precision. Each component plays an essential role in the final product. Whether it’s the oils for moisturizing or the lye for saponification, every element contributes to the soap’s quality. Understanding how to blend these ingredients effectively can transform your soap-making experience, ensuring a smooth texture and a pleasing aroma. Let’s dive into the detailed process of combining ingredients.
Heating Oils
Heating oils is the first step in crafting your handmade liquid soap. This process helps to blend different oils together, creating a uniform mixture. Begin by selecting your oils. Common choices include olive oil, coconut oil, and castor oil. Each oil offers unique benefits, such as moisturizing properties or a gentle lather.
- Olive Oil: Known for its moisturizing qualities.
- Coconut Oil: Provides a rich lather.
- Castor Oil: Adds a silky texture.
To heat the oils, use a double boiler method. Place your oils in a heat-safe bowl over simmering water. This gentle heating prevents overheating, which can alter the oil’s properties. Stir the oils occasionally to ensure even heating. Aim for a temperature between 100°F and 120°F.
Below is a simple table outlining the oils and their ideal temperatures:
| Oil Type | Ideal Temperature |
|---|---|
| Olive Oil | 110°F |
| Coconut Oil | 120°F |
| Castor Oil | 100°F |
Incorporating Lye
Incorporating lye is a crucial step in soap-making. Lye, or sodium hydroxide, is the agent that turns oils into soap. It’s important to handle lye with care, as it is a caustic substance.
Begin by measuring the lye accurately. Use a digital scale for precision. Slowly add the lye to distilled water, never the other way around. Stir the mixture until the lye dissolves completely. This process produces heat and fumes, so ensure proper ventilation.
Safety tips:
- Wear gloves and goggles.
- Work in a well-ventilated area.
- Keep vinegar nearby to neutralize spills.
Once the lye solution cools to about 100°F, it’s ready to be combined with the heated oils. Pour the lye solution gently into the oils, stirring continuously. This gradual incorporation ensures a smooth mixture, setting the stage for the saponification process.
Blending Techniques
Blending techniques are vital for achieving a perfect liquid soap texture. After combining the lye solution with the oils, it’s time to blend. Use an immersion blender for efficient mixing. This tool allows for thorough incorporation, creating a uniform consistency.
Begin blending at low speed. Gradually increase as the mixture starts to thicken. Stop occasionally to check the texture. You’re looking for a light trace, where the mixture leaves a faint line on the surface. This indicates the beginning of saponification.
Important blending tips:
- Start at low speed to avoid splashing.
- Blend in short bursts.
- Check the consistency frequently.
Once the mixture reaches trace, it’s ready for additional ingredients. Essential oils, colorants, and fragrances can be added at this stage. Continue blending until fully incorporated. Pour the soap into molds and allow it to cure, completing the handmade liquid soap journey.
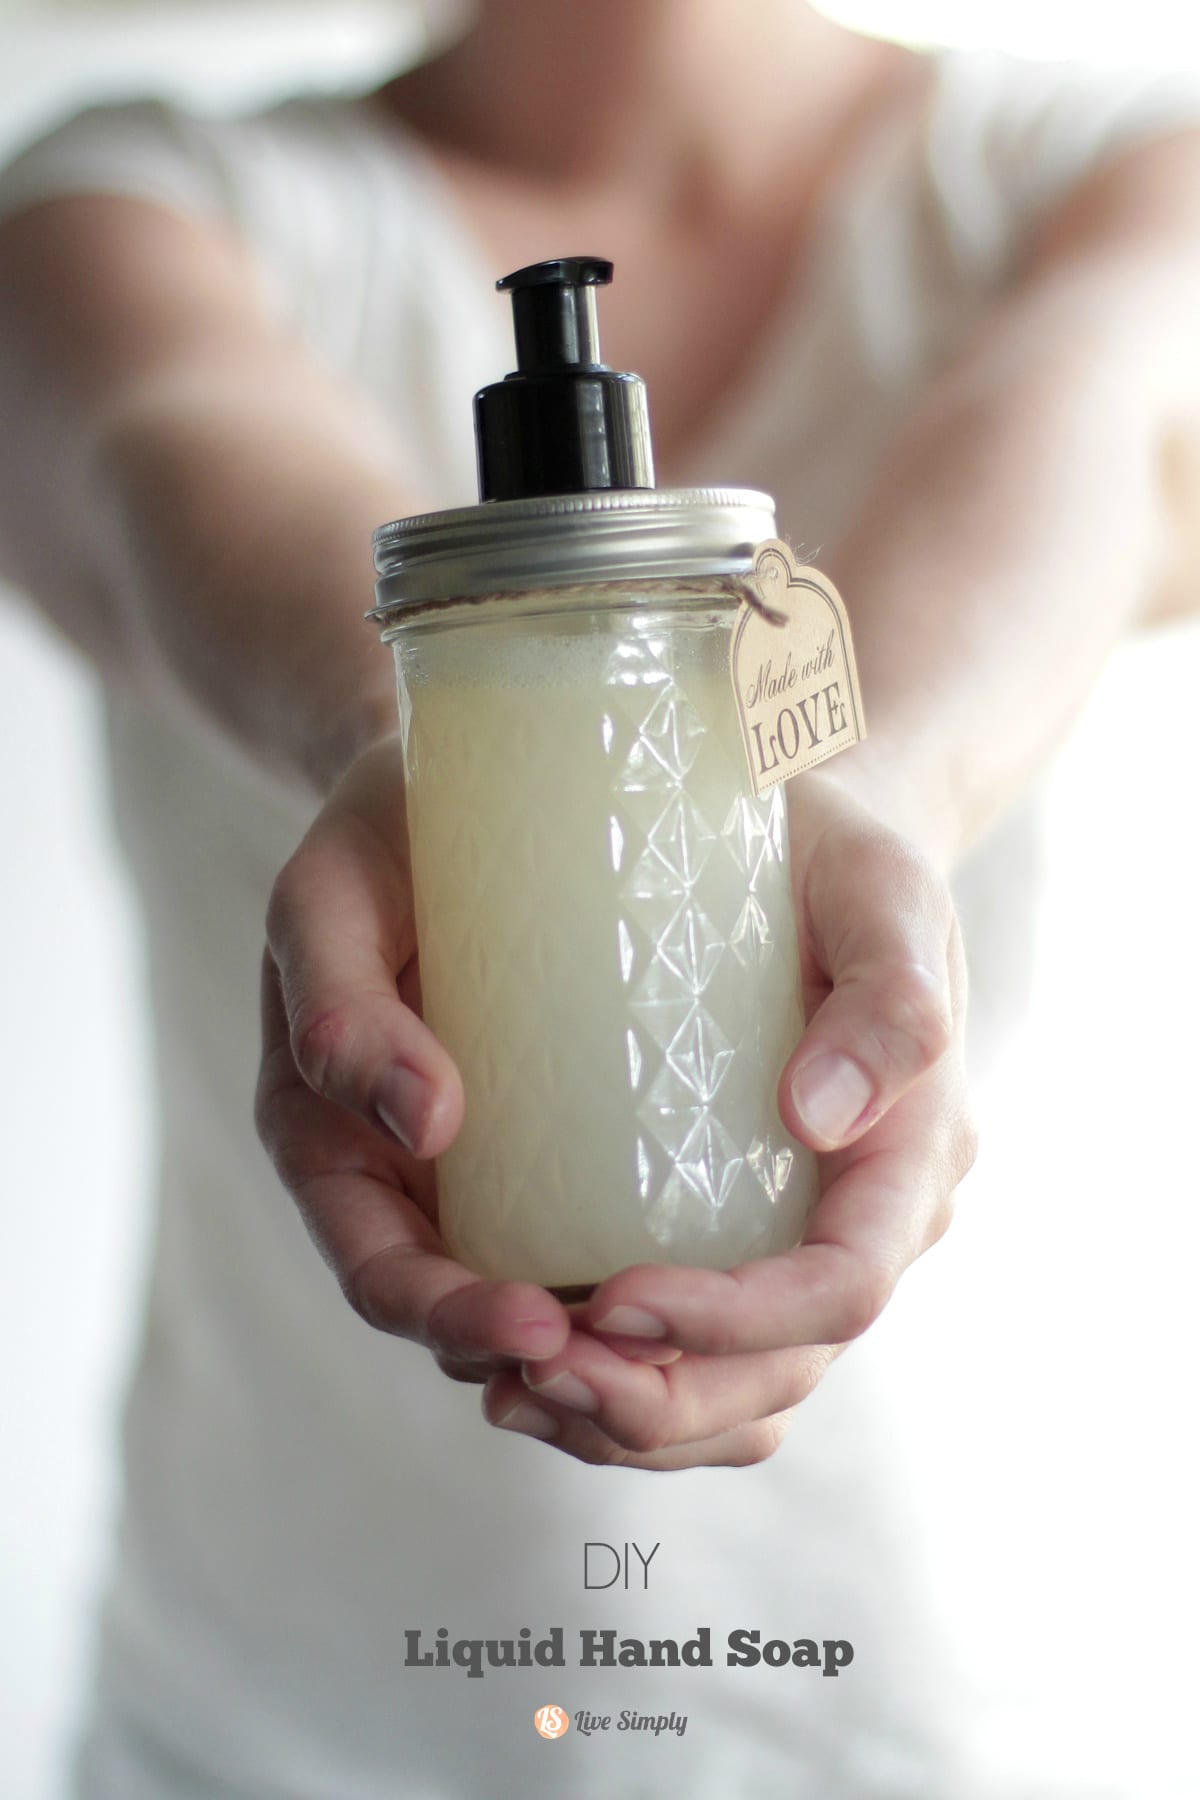
Credit: livesimply.me
Adding Fragrance And Color
Adding fragrance and color to your homemade liquid soap can transform a simple cleaning agent into a delightful sensory experience. This process not only enhances the appeal of your Diy Liquid Soap but also provides an opportunity to customize it to your preferences. By carefully selecting scents and colors, you can create a unique soap that reflects your style and personality. This guide will take you through the steps of choosing scents, incorporating colorants, and ensuring a consistent blend in your Natural Soap Making journey.
Choosing Scents
Choosing the right scent is crucial in creating an inviting and pleasant experience with your Diy Liquid Soap. Essential Oils For Soap are popular choices due to their natural properties and wide variety of fragrances. Here are some tips to help you select the perfect scent:
- Consider the mood: Calming scents like lavender or chamomile are perfect for evening use, while citrus or mint can invigorate your morning routine.
- Think about skin benefits: Some essential oils, like tea tree or eucalyptus, have antiseptic properties that can enhance the Homemade Soap Benefits.
- Mix and match: Combine different essential oils to create a unique fragrance. Start with a base note, then add middle and top notes for complexity.
Here’s a simple table to guide your scent combinations:
| Base Note | Middle Note | Top Note |
|---|---|---|
| Cedarwood | Lavender | Lemon |
| Sandalwood | Geranium | Orange |
Remember, the right scent can enhance the overall experience of your Moisturizing Liquid Soap, making it both functional and enjoyable.
Incorporating Colorants
Adding color to your liquid soap brings a visual appeal that makes your product stand out. Soap Colorants come in various forms, including natural and synthetic options. Here are some ways to incorporate color into your soap:
- Natural Colorants: Ingredients like turmeric, spirulina, or beetroot powder offer vibrant colors without synthetic additives. These options align with the Natural Soap Making ethos.
- Synthetic Colorants: Lab-created dyes provide a wider range of colors and are often more stable. They’re great for consistent results.
- Layering Techniques: For a more artistic touch, use Soap Mixing Techniques to create layers of different colors in your soap.
To ensure a smooth blend, dissolve powdered colorants in a small amount of liquid before adding them to your soap. This prevents clumping and ensures even distribution.
Mixing For Consistency
Achieving the right consistency in your Diy Liquid Soap is key to a pleasant user experience. Here are some Soap Mixing Techniques to help you reach the perfect consistency:
- Stirring: Use a whisk or a hand blender to mix your Liquid Soap Ingredients thoroughly. This ensures all components are well integrated.
- Thickening Agents: If your soap is too runny, consider adding natural thickeners like salt or xanthan gum.
- Cold Process Soap Adjustments: If using the cold process method, monitor the soap as it cools. Adjust the consistency by adding more water or oils if needed.
Consistency affects not only the feel of the soap but also its ability to cleanse and moisturize. By mastering the art of mixing, you ensure your Handmade Soap Recipes deliver on both fronts.
Pouring And Setting
Making handmade liquid soap is a satisfying craft that combines creativity with practicality. The process of pouring and setting is crucial in determining the final quality of your soap. This phase involves carefully pouring the liquid soap mixture into molds, allowing it to set, and then cutting it into usable pieces. Each step requires precision and patience to ensure a beautifully crafted product.
Molding Options
Choosing the right mold for your soap is essential for achieving your desired shape and size. Molds come in various materials, each with its unique benefits. Here are some popular options:
- Silicone Molds: Easy to use and flexible. They allow for easy removal of the soap without damage.
- Plastic Molds: Affordable and available in many designs. However, they are less flexible than silicone.
- Wooden Molds: Durable and provide a rustic look. They require lining with parchment paper to prevent sticking.
- Metal Molds: Offer durability but can be difficult to remove soap from if not properly lined.
When selecting a mold, consider the final look of your soap. If you want intricate designs, choose molds with detailed patterns. For a simple bar, a basic rectangular mold will suffice.
Setting Time
Setting time is crucial for the soap to harden properly. The time required can vary based on several factors:
- Temperature: Cooler temperatures may extend setting time.
- Humidity: High humidity can slow the process.
- Ingredients: Certain additives, like oils, can affect hardening.
Typically, handmade liquid soap requires about 24 to 48 hours to set fully. Here’s a simple table to help you understand the average setting times based on different conditions:
| Condition | Average Setting Time |
|---|---|
| Cool and Dry | 24-36 hours |
| Warm and Humid | 36-48 hours |
Ensure the soap is firm before proceeding to the next step. Touch the surface; it should not leave an indentation.
Cutting The Soap
Once the soap is set, it’s time to cut it into bars. Proper cutting ensures uniformity and usability. Follow these steps for an easy cutting process:
- Remove the soap from the mold: Gently press or peel away the mold.
- Use a sharp knife or soap cutter: This helps achieve clean, even cuts.
- Measure before cutting: Use a ruler to ensure each bar is of equal size.
Consider the following tips for perfect cuts:
- Warm the knife under hot water: This allows smoother cuts.
- Cut slowly and steadily: Avoid rushing, as this can cause uneven edges.
- Use a cutting guide: If available, a guide ensures precise measurements.
Store the cut bars in a cool, dry place to allow any remaining moisture to evaporate. Proper cutting and storage will leave you with beautifully crafted soap ready for use or gifting.
Curing Process
Making handmade liquid soap is a rewarding craft that blends creativity with science. After mastering the soap making process, you enter the crucial phase known as the curing process. This step ensures your soap reaches its full potential in terms of quality and longevity. Curing is not merely about waiting; it’s about transforming your handcrafted creation into a gentle, moisturizing liquid soap. The curing process is essential for achieving the best texture, lather, and skin benefits.
Importance Of Curing
Curing plays a pivotal role in the crafting liquid soap process. It allows the soap to become milder and enhances its moisturizing properties. During this period, the soap continues to undergo saponification, ensuring all lye is neutralized. This is crucial since lye safety precautions are vital for safe usage.
Why Cure Your Soap?
- Neutralization: Ensures complete saponification of lye, making it safe for skin contact.
- Improved Texture: Curing helps achieve a smoother, more consistent texture.
- Enhanced Fragrance: Allows essential oils for soap to blend well, resulting in a balanced scent.
The curing process also impacts the soap’s longevity. Well-cured soap doesn’t dissolve quickly, offering better value. A table below highlights the changes during curing:
| Aspect | Before Curing | After Curing |
|---|---|---|
| pH Level | Higher, potentially irritating | Neutral, safe for skin |
| Hardness | Softer, dissolves easily | Firmer, long-lasting |
| Fragrance | Faint, unbalanced | Rich, well-rounded |
Duration
The soap curing time is a key factor in determining the final product’s quality. While the soap making process might be quick, patience is required during curing. Typically, liquid soap requires at least two weeks to cure, but some recipes might need up to four weeks.
Factors Affecting Curing Time:
- Ingredients Used: Certain liquid soap ingredients might extend or reduce curing time.
- Ambient Conditions: Temperature and humidity can influence the process.
- Recipe Variations: A handmade liquid soap recipe with more oils might need longer curing.
Keeping track of curing duration is vital. A simple chart can help:
| Week | Expected Changes |
|---|---|
| 1 | Initial saponification, soap is still soft |
| 2 | Begins to harden, fragrance settling |
| 3 | Further hardening, pH levels stabilizing |
| 4 | Fully cured, ready for use |
Storage Tips
Proper storage is as essential as the curing process itself. Once your soap is cured, the way you store it can influence its lifespan and quality. Homemade soap storage should keep the soap dry and protected from environmental factors.
Effective Storage Practices:
- Use Ventilated Containers: Allows air circulation, preventing moisture buildup.
- Avoid Direct Sunlight: Keeps soap from drying out and losing essential oils for soap fragrance.
- Store in Cool Areas: Maintains soap integrity and prevents melting.
Packaging also plays a role. Consider using breathable materials like paper or cloth wraps instead of plastic. This approach promotes natural soap benefits by keeping your product fresh and effective.
Remember, the goal is to maintain a balance between protection and breathability. Proper storage ensures your moisturizing liquid soap retains its quality and effectiveness over time.
Using And Storing Soap
Making handmade liquid soap is a rewarding craft. It allows you to create a product tailored to your preferences. Once you’ve made your soap, knowing how to use and store it is essential. Proper storage ensures the soap stays fresh and effective. Using it correctly can enhance your experience and skin benefits.
Best Practices
To get the most out of your handmade liquid soap, follow some best practices. These ensure the soap remains effective and pleasant to use.
- Use a Pump Dispenser: This helps control the amount of soap used and prevents contamination.
- Store in a Cool, Dry Place: Heat and moisture can affect the soap’s quality.
- Shake Before Use: Natural ingredients may settle over time. Shaking helps to mix them.
Consider the following table for more tips:
| Tip | Benefit |
|---|---|
| Avoid Direct Sunlight | Preserves fragrance and color |
| Label the Container | Prevents confusion with other liquids |
Shelf Life
Handmade liquid soap has a different shelf life than commercial products. Understanding this helps you use the soap effectively.
The shelf life of handmade soap is usually 6 months to a year. This depends on ingredients and storage conditions. Natural preservatives can extend this time. Essential oils might lose potency after a while. Keep this in mind for best results.
Follow these steps to check if the soap is still good:
- Check for any unusual odors.
- Look for changes in color or texture.
- Test a small amount on your skin for irritation.
Proper storage can help maintain the soap’s shelf life. Always use clean hands or tools when handling the soap.
Benefits Of Handmade Soap
Handmade liquid soap offers unique benefits. These make it a favorite for many users.
Natural Ingredients: Unlike commercial soaps, handmade soaps often contain natural oils and butters. This is great for sensitive skin.
Customization: You can tailor the soap to your needs. Choose scents, colors, and textures you like.
Moisturizing Properties: Glycerin, a natural byproduct, helps retain moisture. This leaves your skin feeling soft and hydrated.
Here’s why people love handmade soap:
- Eco-Friendly: Less packaging and fewer chemicals mean a smaller environmental footprint.
- Support Small Businesses: Many handmade soaps are crafted by local artisans.
- Unique Scents: Enjoy personalized fragrance blends not found in stores.
Handmade soap is not just a cleaning product. It’s a personal care choice that benefits both you and the planet.

Credit: lovelygreens.com
How To Make Soap Liquid At Home?
Making liquid soap at home can be a rewarding experience. It’s a chance to create a product tailored to your preferences. With homemade liquid soap, you control the ingredients, ensuring it’s gentle on skin and free from harsh chemicals. This guide provides step-by-step instructions on how to make soap liquid at home, using simple ingredients you can find in your kitchen or local store. Gather your materials, and let’s start crafting a liquid soap that’s perfect for your family.
What Are The Ingredient Used For Making Liquid Soap?
Creating liquid soap involves a few essential ingredients. Each plays a specific role in the soap-making process. Here’s a breakdown of the key components:
- Lye: Also known as potassium hydroxide, it is crucial for saponification.
- Oils: Common choices include olive oil, coconut oil, and castor oil. They provide moisture and lather.
- Water: Essential for dissolving lye and mixing with oils.
- Fragrances: Essential oils, like lavender or peppermint, for a pleasant scent.
- Colorants: Natural options like turmeric or spirulina for a touch of color.
These ingredients work together to create liquid soap from scratch. The oils nourish the skin, while the lye ensures the mixture transforms into soap. Fragrances and colorants add personal touches to the final product.
| Ingredient | Purpose |
|---|---|
| Lye | Saponification |
| Oils | Moisture and lather |
| Water | Mixing and dissolving |
| Fragrances | Scent |
| Colorants | Visual appeal |
How To Make Your Own Liquid Body Soap?
To make your own liquid body soap, follow these steps:
- Gather Supplies: Get all ingredients and equipment ready. Safety goggles and gloves are essential.
- Mix Lye Solution: Slowly add lye to water, stirring gently. Never add water to lye. Let it cool.
- Combine Oils: Heat oils in a pot until melted. Allow to cool slightly.
- Blend Mixtures: Gradually add lye solution to oils. Use a stick blender for emulsification.
- Add Fragrance: Mix in essential oils once trace is reached. This is the point where the mixture thickens.
- Cure Soap: Pour into molds and cover. Let it sit for 24 hours.
- Dilute Soap: Once cured, mix with water to achieve liquid consistency.
Making liquid soap from scratch requires patience and precision. The key is to ensure the lye solution and oils are at the right temperatures. This ensures proper saponification, resulting in a smooth, effective liquid soap.
What Is The General Formula Of Liquid Soap?
Liquid soap follows a simple formula, focusing on the ratio of ingredients for optimal results. Here’s the general formula:
| Component | Percentage |
|---|---|
| Lye | 10% |
| Oils | 60% |
| Water | 25% |
| Fragrances and additives | 5% |
These percentages ensure the soap is balanced, offering cleansing properties and skin nourishment. Adjust fragrances and additives to suit preferences. The formula is adaptable, allowing for customization based on desired scent and texture.
Understanding how to make liquid soap from scratch involves knowing the proportions. Correct ratios lead to successful saponification, creating a liquid soap that’s both effective and gentle.
Frequently Asked Questions
How Do You Make Liquid Soap From Scratch?
To make liquid soap from scratch, mix water, potassium hydroxide, and oils. Heat and blend until the paste thickens. Dilute with water, then add fragrance or color if desired. Let the soap cool and pour into bottles for use.
What Are The 3 Ingredients Liquid Soap?
Liquid soap typically contains three key ingredients: water, surfactants, and moisturizing agents. Water acts as the base, surfactants help in cleaning by breaking down oils, and moisturizing agents ensure skin remains hydrated. These ingredients work together to create an effective and gentle cleansing product.
What Ingredient Should Not Be In Hand Soap?
Triclosan should not be in hand soap. It can disrupt hormones and contribute to antibiotic resistance. Opt for soaps with natural ingredients to ensure safety and effectiveness. Always check labels for harmful chemicals to protect your skin and health.
Is Lye Necessary For Liquid Soap Making?
Lye is essential for making liquid soap. It initiates saponification, transforming oils into soap. Without lye, the soap-making process cannot occur. Proper handling ensures safety and quality. Always follow guidelines when using lye for soap making.
Conclusion
Creating handmade liquid soap is both fun and rewarding. You control the ingredients, ensuring a natural product. This process can save money and reduce waste. Plus, your homemade soap can be personalized. Choose scents that please your senses. Share with friends and family for a personal touch.
Experiment with colors and textures for variety. Remember, practice makes perfect. Don’t worry about mistakes; they’re part of learning. Enjoy the satisfaction of using something crafted by your hands. Now, gather your supplies and start your soap-making journey. Embrace the creativity and care in every drop.