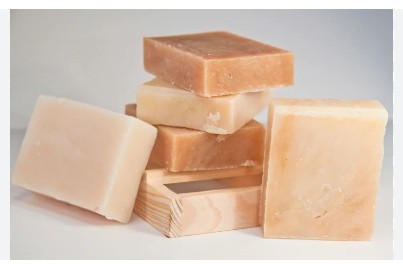
Making handmade soap bars is a fun and creative process. It lets you customize scents and ingredients to suit your preferences.
Crafting your own soap can be both rewarding and therapeutic. The process involves simple ingredients and steps, making it accessible for beginners. Handmade soap bars offer a personal touch in daily routines. They can be gentle on the skin, free from harsh chemicals.
You can choose natural oils, fragrances, and colors. This allows for endless possibilities. Whether you want a soothing lavender bar or an invigorating mint, it’s all up to you. Plus, handmade soaps make thoughtful gifts for family and friends. Imagine giving a soap bar crafted with love and care. It’s a simple way to show you care. Let’s explore the steps to create your own unique soap bars.

Credit: handmadefarmhouse.com
Ingredients Needed
Creating your own handmade soap bars is an exciting and rewarding endeavor. Understanding the ingredients needed is crucial for crafting those perfect bars. Whether you’re diving into natural soap making or exploring the melt and pour soap method, knowing what goes into your soap will make all the difference. This guide will help you navigate essential oils, colorants, and base oils, ensuring your DIY soap bars come out beautifully aromatic and visually pleasing. Let’s dive into these essential soap crafting tips!
Essential Oils
Essential oils are a fundamental component in scented soap bars, providing both fragrance and therapeutic benefits. Their natural properties enrich your handmade soap recipe, making each bar unique.
- Lavender Oil: Known for its calming properties, perfect for evening relaxation.
- Lemon Oil: Provides a refreshing and invigorating scent, ideal for morning showers.
- Tea Tree Oil: Offers antibacterial benefits, great for skin health.
Choosing the right essential oils is crucial for achieving the desired aroma and benefits. Here’s a quick table to guide your selection:
| Essential Oil | Properties | Best Used For |
|---|---|---|
| Lavender | Calming, Soothing | Relaxation |
| Lemon | Refreshing, Energizing | Morning Wake-Up |
| Tea Tree | Antibacterial, Healing | Skin Health |
Colorants
Colorants give your soap bars a vibrant look, transforming ordinary soap into a piece of art. Whether you’re using natural or synthetic options, the right colorant can make your soap stand out.
Natural soap making often involves organic soap ingredients like:
- Clays: Red, green, or white clay for subtle earthy tones.
- Activated Charcoal: Provides a striking black hue with detoxifying benefits.
- Spices: Turmeric or paprika for warm, inviting colors.
Soap making techniques vary, but colorants can be mixed directly into the melted soap base. Here’s a simple guide:
- Melt And Pour Soap: Easily incorporates colorants during the melting process.
- Cold Process Soap: Mix colorants with oils before adding lye for even distribution.
Base Oils
Base oils are the backbone of any soap making process, providing moisture, texture, and cleansing properties. Choosing the right oils impacts the quality and feel of your soap bars.
Popular base oils for soap crafting include:
- Coconut Oil: Offers excellent cleansing properties and a rich lather.
- Olive Oil: Known for its moisturizing benefits, gentle on the skin.
- Palm Oil: Provides hardness and longevity to soap bars.
Understanding the role of each base oil helps in creating a balanced handmade soap recipe. Here’s a quick overview:
| Base Oil | Properties | Soap Type |
|---|---|---|
| Coconut | Cleansing, Lather | All Skin Types |
| Olive | Moisturizing, Gentle | Dry Skin |
| Palm | Hardness, Long-Lasting | General Use |
Experimenting with different base oils can lead to unique combinations in your DIY soap bars, allowing you to tailor each batch to your preferences.

Credit: www.healthline.com
Tools Required
Creating handmade soap bars is a delightful and rewarding hobby. It allows you to craft personalized, unique scents and designs. To get started, having the right tools is essential. The right equipment ensures your soap-making process is smooth and safe. Let’s explore the key tools required to make your soap-making experience enjoyable and efficient.
Molds
Molds are crucial in shaping your soap bars. They come in various materials and designs. Choosing the right mold can greatly affect the final look of your soap. Here are some common types of molds:
- Silicone Molds: These are flexible and easy to use. They come in many shapes, allowing creative designs. Silicone molds also make unmolding easy.
- Plastic Molds: Generally more affordable. They are great for beginners. However, they might be less flexible than silicone molds.
- Wooden Molds: Ideal for large batches. You can line them with parchment paper for easy removal. They give a rustic look to your soap bars.
Consider the size and shape that fits your needs. A rectangular mold is perfect for classic soap bars. For more creativity, try molds with intricate designs or themed shapes. Here’s a simple comparison table:
| Material | Advantages | Disadvantages |
|---|---|---|
| Silicone | Flexible, versatile | Can be more expensive |
| Plastic | Cost-effective, easy to find | Less flexible |
| Wooden | Great for large batches | Requires lining |
Mixing Tools
Mixing tools are essential for blending your ingredients smoothly. Proper mixing ensures consistency in texture and quality. Here are some important mixing tools:
- Stainless Steel or Glass Bowls: These materials are non-reactive. They help maintain the purity of your soap.
- Hand Mixer or Stick Blender: These tools are crucial for blending oils and lye. They speed up the process, saving you time and effort.
- Spatulas and Spoons: Use rubber or silicone spatulas. They help scrape every bit of your mixture, reducing waste.
It’s crucial to use dedicated tools for soap-making. Avoid using kitchen utensils to prevent contamination. Here’s a simple list of mixing tools you might need:
- Stainless Steel or Glass Bowls
- Hand Mixer or Stick Blender
- Rubber or Silicone Spatulas
- Measuring Cups and Spoons
Protective Gear
Safety is paramount in soap-making. Protective gear safeguards you from potential hazards. Here’s a rundown of essential protective gear:
- Gloves: Use nitrile or latex gloves. They protect your skin from lye and other chemicals.
- Safety Goggles: Protect your eyes from splashes. They are a must-have for every soap maker.
- Apron: A sturdy apron keeps your clothes clean. It also provides a layer of protection against spills.
Wearing the right protective gear enhances your safety and confidence. Always ensure your workspace is well-ventilated to avoid inhaling fumes. Here’s a quick checklist for your safety gear:
- Nitrile or Latex Gloves
- Safety Goggles
- Sturdy Apron
- Mask (optional for extra protection)
By equipping yourself with the right tools and protective gear, you lay the foundation for successful soap-making. Happy crafting!
Choosing A Recipe
Creating handmade soap bars is a rewarding craft that combines science and art. Choosing a recipe is the first step in this exciting journey. The type of soap you wish to create will depend on the method you choose. Each method offers unique benefits and challenges. Whether you’re drawn to the traditional cold process, the quick hot process, or the beginner-friendly melt and pour, understanding each technique will help you find your perfect fit. Let’s explore these options and discover how they can shape your artisan soap crafting adventure.
Cold Process
The cold process is a classic method in the world of soap making. It allows for a deep dive into artisan soap crafting. This technique involves mixing oils and lye to create a chemical reaction known as saponification. It’s ideal for those who enjoy the chemistry behind soap making.
- Natural Ingredients For Soap: Use oils like olive, coconut, and palm.
- Essential Oils For Soap: Lavender, peppermint, and eucalyptus are popular choices.
Cold process soap requires patience. The soap curing process can take four to six weeks. This time allows the soap to harden and develop its final texture. Remember, lye safety in soap making is crucial. Always wear gloves and goggles.
| Benefits | Challenges |
|---|---|
| Customizable ingredients | Long curing time |
| Rich textures | Requires careful handling of lye |
Hot Process
The hot process offers a faster alternative to traditional soap making. Heat accelerates saponification, allowing soap to be used sooner. This method is perfect for those who want to experiment with soap making techniques.
- Melt oils and lye together.
- Cook the mixture until it resembles mashed potatoes.
- Add essential oils for soap after cooking.
Hot process soap has a rustic appearance. It can be ready to use in a few days. The texture is less smooth compared to cold process soap but offers a unique charm. Soap making supplies like a slow cooker can make the process easier.
Hot process allows for immediate customization. Add colors and fragrances at the end of cooking. This flexibility makes it a favorite among DIY enthusiasts looking to create handmade soap recipes quickly.
Melt And Pour
Melt and pour is the easiest method for beginners. It requires glycerin soap base, which is melted down and poured into molds. This approach is great for those new to soap making techniques.
- Soap Making Supplies: Pre-made base, molds, and fragrances.
- Essential Oils For Soap: Enhance with oils like chamomile or lemon.
Melt and pour soap is ready to use in hours. There’s no need for a soap curing process. This makes it perfect for quick projects or gifts. The process is safe, as no lye is involved.
Customization is simple. Add colors, glitter, or embeds for unique designs. This method suits those who enjoy crafting but prefer not to deal with chemicals. With melt and pour, you can create DIY soap bars with ease and creativity.
Safety Precautions
Making handmade soap bars is a delightful and rewarding hobby. It allows you to create customized, skin-friendly soap using natural ingredients. However, ensuring safety during the soap-making process is crucial. This guide outlines essential safety precautions to protect yourself and your workspace.
Handling Lye
Lye, or sodium hydroxide, is a key ingredient in soap making. It is a strong chemical that requires careful handling. Always wear protective gear when working with lye. This includes goggles, gloves, and long-sleeved clothing. These items protect your skin and eyes from accidental splashes.
When mixing lye with water, always add lye to water, not the other way around. Adding water to lye can cause a dangerous reaction. Here’s a simple process to follow:
- Use a well-ventilated area to avoid inhaling fumes.
- Stir slowly to prevent splashes.
- Use a heat-resistant container to mix lye.
Here’s a quick reference table for handling lye safely:
| Safety Gear | Why It’s Important |
|---|---|
| Goggles | Protects eyes from splashes |
| Gloves | Prevents chemical burns on hands |
| Apron | Shields clothing and skin |
Workspace Safety
Creating a safe workspace is essential for soap making. A well-organized area minimizes risks and enhances efficiency. Clean your workspace before starting. Remove any clutter that could cause accidents. Ensure that your work surface is stable and heat-resistant.
Here are some tips to maintain workspace safety:
- Keep all ingredients and tools within reach.
- Use dedicated equipment for soap making.
- Ensure proper ventilation to disperse fumes.
Consider labeling all containers to avoid confusion. Labeling helps prevent accidental mixing of ingredients. Never leave your workspace unattended while lye is being handled. This prevents accidents and ensures constant monitoring of the process.
Storage Tips
Proper storage of soap and ingredients maintains quality and safety. Store lye in a cool, dry place out of reach of children and pets. Ensure the container is tightly sealed to prevent moisture absorption.
Here are some storage tips:
- Label all storage containers clearly.
- Keep finished soap bars in a dry, ventilated area.
- Use airtight containers for ingredients.
To keep your soap bars fresh, wrap them in wax paper or place them in a breathable bag. This prevents dust accumulation and maintains their fragrance. Regularly check your stored ingredients for any signs of spoilage. Discard any materials that appear off or have an unusual odor.
Preparing The Mixture
Handmade soap bars offer a unique touch to your bath routine. Preparing the mixture is a key step in Natural Soap Making. It involves combining ingredients to create a base that can be customized with scents and textures. For those new to Cold Process Soap, this might seem daunting. But with the right Soap Making Supplies, it becomes an enjoyable craft. Here’s how to prepare the mixture for your Diy Soap Bars.
Measuring Ingredients
Accurate measurements are crucial in crafting perfect Handmade Soap Bars. You need to balance oils, lye, and water precisely. Begin by gathering your Soap Making Supplies. A digital scale is ideal for measuring ingredients like lye and oils.
Here’s a basic guide to ensure accuracy:
- Oils: Measure in grams for precision. Common choices include olive, coconut, and palm oils.
- Lye: Handle with care due to Lye Safety. Use a lye calculator to determine the exact amount needed.
- Water: Distilled water is preferred to avoid impurities that affect Soap Curing Time.
Table for Reference:
| Ingredient | Measurement |
|---|---|
| Olive Oil | 500 grams |
| Coconut Oil | 200 grams |
| Palm Oil | 300 grams |
| Lye | 120 grams |
| Water | 300 grams |
Precision is key. It ensures your soap is safe and effective.
Mixing Process
Once ingredients are measured, the mixing process begins. It’s an essential step in Natural Soap Making. Start by combining lye and water. Remember, Lye Safety is crucial, so wear gloves and goggles.
Steps to follow:
- Combine Lye and Water: Slowly add lye to water. Stir until dissolved.
- Melt Oils: In a separate pot, heat oils until melted. Maintain a steady temperature.
- Blend Mixtures: Pour the lye solution into the melted oils. Use a stick blender for thorough mixing.
Keep blending until you reach ‘trace’. This is when the mixture thickens and leaves a trail on the surface. It’s a sign your base is ready for Soap Molding Techniques.
Consistency is crucial. Ensure the mixture is smooth for even curing.
Adding Fragrance
Adding fragrance is a delightful part of creating Diy Soap Bars. Essential Oils For Soap are popular choices. They offer natural scents without synthetic chemicals.
Consider these tips:
- Choose Essential Oils: Lavender, peppermint, and eucalyptus are popular. They provide soothing aromas.
- Measure Carefully: Essential oils are potent. Use 20-30 grams per batch for a balanced scent.
- Mix Thoroughly: Blend oils into the soap base after reaching trace. This ensures even distribution.
Table for Common Fragrances:
| Essential Oil | Recommended Amount |
|---|---|
| Lavender | 25 grams |
| Peppermint | 20 grams |
| Eucalyptus | 30 grams |
Fragrance adds personality to your soap. It makes each Handmade Soap Recipe unique.
Pouring The Soap
Making handmade soap bars is a rewarding and creative process. One of the most exciting parts is pouring the soap. This stage transforms liquid soap into a solid masterpiece. Pouring the soap involves precision and care. It ensures that your soap bars come out just right. Whether you’re a beginner or an expert, mastering this step is crucial. Let’s dive into the details of pouring the soap to help you create the perfect handmade soap bars.
Filling Molds
Filling the molds is an essential step in soap making. It requires careful attention to detail. The molds determine the shape and size of your soap bars. Before pouring, ensure your molds are clean and dry. This prevents imperfections in the final product.
Use the following steps to fill your molds efficiently:
- Stir your soap mixture thoroughly to avoid air bubbles.
- Pour the soap slowly into the mold to maintain a smooth surface.
- Fill each mold to the top to ensure even bars.
If you’re using multiple molds, a table can help you track your progress:
| Mold Number | Status |
|---|---|
| 1 | Filled |
| 2 | Filled |
| 3 | Pending |
Remember, filling molds with precision ensures your soap bars are uniform and professional.
Smoothing The Surface
A smooth surface is key to attractive soap bars. After pouring, you may notice air bubbles or uneven tops. These can affect the soap’s appearance. Smoothing the surface is a simple but important task.
Here are some methods to achieve a smooth finish:
- Gently tap the mold on a flat surface to release trapped air bubbles.
- Use a spatula to level the top of the soap.
- Spray alcohol lightly on the surface to pop small bubbles.
These techniques help in achieving a polished look. A neat surface enhances the overall appeal of your soap bars. Paying attention to details at this stage makes a big difference.
Creating Designs
Designs add a personal touch to your soap bars. They make your creations stand out. Creating designs is a fun and creative part of soap making. It allows you to express your artistic side.
Consider these design techniques:
- Swirling: Use a stick or spoon to create swirl patterns.
- Layering: Pour different colors in layers for a striped effect.
- Embedding: Insert small shapes or objects into the soap.
Each technique offers unique results. Choose a design that reflects your style. Experimenting with different methods can lead to beautiful and unique soap bars. Let your creativity shine through your designs.
Curing Time
Making handmade soap bars is a fulfilling and creative process. One critical step in this journey is the curing time. This phase allows the soap to harden and develop its full potential. Proper curing ensures the soap is mild, long-lasting, and effective. It is essential to understand the details of this stage to produce the best soap bars.
Duration
Curing time typically lasts between 4 to 6 weeks. This period allows water to evaporate slowly, enhancing the soap’s hardness and quality. The duration can vary based on factors such as:
- Humidity levels in your environment
- Type of oils used in the soap
- Thickness of the soap bars
During this time, place the soap bars on a rack with good airflow. This aids in drying and prevents issues like mold. Cover the bars lightly with a cloth to protect them from dust. Avoid stacking bars as this can affect air circulation.
Here’s a simple table outlining the ideal conditions for curing:
| Factor | Ideal Condition |
|---|---|
| Temperature | 65-75°F (18-24°C) |
| Humidity | Less than 50% |
| Airflow | Good circulation |
Monitoring these conditions will help ensure a successful curing process.
Checking Hardness
After a few weeks of curing, it’s time to check the hardness of the soap bars. Hardness is crucial for durability and user satisfaction. A simple press test can help. Gently press your thumb into the center of a bar. It should feel firm, not soft or sticky.
If the soap is still soft, extend the curing time. Check every few days until the desired hardness is reached. Another method is weighing the bars. If the weight reduces consistently, the bars are drying well.
Consider these factors affecting hardness:
- Oil composition: Some oils, like olive, create softer bars.
- Temperature: Cooler conditions may slow curing.
Keeping track of these elements ensures your soap achieves optimal hardness.
Cutting The Bars
Once the soap is hard, it’s time to cut the bars. Cutting should be done carefully to maintain quality. Use a sharp knife or a soap cutter for clean cuts. Ensure the bars are uniform for aesthetic appeal and easy use.
Follow these steps for effective cutting:
- Measure the desired size before cutting.
- Cut slowly to avoid crumbling.
- Trim edges for a neat finish.
Store cut bars on a rack to continue curing. Proper storage allows further evaporation of water, enhancing hardness. Remember, cutting the bars correctly reflects the craftsmanship and attention given to your handmade soap.
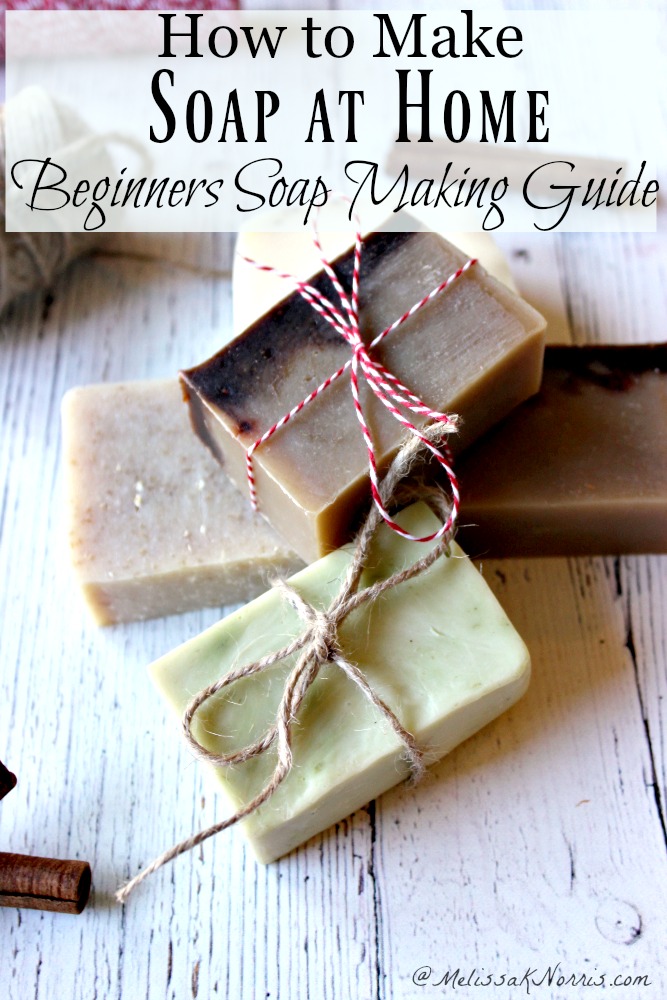
Credit: melissaknorris.com
Packaging Ideas
Creating handmade soap bars is a fun and rewarding craft. Once your beautiful soaps are ready, presenting them in an attractive way becomes essential. Thoughtful packaging not only protects your soap but also adds a personal touch. Let’s explore some creative packaging ideas that will make your handmade soap bars stand out.
Labeling
Labels are a crucial part of soap packaging. They provide necessary information and enhance the product’s appeal. A well-designed label can make your soap bar memorable and recognizable.
When designing labels, consider the following elements:
- Brand Name: Ensure it’s prominent and easy to read.
- Ingredients List: Many customers appreciate knowing what’s in their soap.
- Weight: Mention the weight of the soap bar in ounces or grams.
- Contact Information: Include your website or email for customer inquiries.
Here’s a simple table to help you organize your label information:
| Element | Description |
|---|---|
| Brand Name | The name of your soap brand |
| Ingredients | List of all ingredients used |
| Weight | Net weight of the soap bar |
| Contact Info | Website or email address |
Gift Wrapping
Gift wrapping transforms a simple soap bar into a thoughtful present. It’s an excellent way to add value and show care. Here are some ideas to inspire your gift wrapping:
Consider using:
- Decorative Paper: Choose patterns that match the soap’s scent or theme.
- Ribbons and Bows: Add a ribbon or bow for a touch of elegance.
- Personalized Tags: Attach a small tag with a personal message.
For a more luxurious touch, you can use:
- Fabric Wraps: Soft fabrics like muslin or burlap create a rustic look.
- Boxes: Small gift boxes offer protection and style.
Eco-friendly Options
Eco-friendly packaging is an excellent choice for environmentally conscious customers. It reduces waste and appeals to those who prioritize sustainability. Here are some eco-friendly packaging ideas:
Use materials such as:
- Kraft Paper: Biodegradable and gives a natural look.
- Recycled Materials: Use materials that have been recycled.
- Plant-Based Inks: Choose inks that are non-toxic and sustainable.
Consider these eco-friendly packaging methods:
- Minimal Packaging: Use the least amount of packaging needed.
- Reusable Packaging: Encourage customers to reuse packaging.
- Compostable Options: Materials that break down naturally are ideal.
These eco-friendly choices not only help the planet but also attract customers who value sustainability.
What Are The Ingredients For Making Bar Soap?
Creating handmade soap bars is a rewarding craft that combines creativity and practicality. Understanding the ingredients used in bar soap making is the first step in this DIY adventure. The basic ingredients include oils, lye, and water, which together form a simple yet effective soap. Oils like olive, coconut, and palm are popular choices due to their skin-loving properties. Lye, also known as sodium hydroxide, is essential for the saponification process, which turns oils into soap. Water acts as the medium that helps mix lye with oils. Additional ingredients such as essential oils for soap and natural colorants can be added for fragrance and appearance. Now, let’s explore how to create your own soap bars at home, even if you’re a beginner.
How To Make Homemade Soap Bars For Beginners?
Starting with soap making can seem daunting, but with the Beginner Soap Making Guide, it’s quite simple. Follow these steps to create your own melt and pour soap:
- Gather your soap making supplies, including a pre-made melt and pour soap base, essential oils for fragrance, and soap molds.
- Cut the soap base into small cubes and melt it in a microwave or a double boiler.
- Once melted, stir in a few drops of your chosen essential oils for soap.
- Pour the melted soap into molds and let them cool and harden.
This process is simple and avoids the use of lye, making it perfect for beginners. Experiment with different organic soap crafting ingredients to create unique soap bars.
How Handmade Soaps Are Made?
Handmade soaps can be made using various methods, including the cold process soap technique. This method involves mixing lye and oils to create a chemical reaction known as saponification. Here’s a basic overview:
- Measure and mix your oils, such as olive or coconut oil.
- In a separate container, carefully mix lye and water.
- Combine the lye solution with the oils and blend until it thickens.
- Add any handmade soap recipes ingredients like natural colorants or essential oils.
- Pour the mixture into molds and let it cure for 4-6 weeks.
This method produces long-lasting glycerin soap bars with a rich lather. While more advanced, it allows for greater customization and creativity.
How To Make Natural Soap Without Chemicals?
For those preferring a natural approach, it’s possible to make soap without harsh chemicals. Here’s how:
| Ingredients | Natural Alternatives |
|---|---|
| Lye | Use a lye-free soap base |
| Artificial Fragrances | Use essential oils for soap |
| Artificial Colorants | Use natural colorants like clays or spices |
Diy soap making with natural ingredients ensures a gentle product. Choose a natural soap ingredients base and incorporate organic elements like herbs or oatmeal. This approach yields organic soap crafting results that are kind to your skin and the environment.
Frequently Asked Questions
What Are The Ingredients In Homemade Soap Bars?
Homemade soap bars typically include oils like olive, coconut, and palm. They also contain lye for saponification. Essential oils add fragrance, while herbs or exfoliants provide texture. Some recipes might include colorants for aesthetic appeal. These natural ingredients ensure a gentle and moisturizing soap suitable for various skin types.
Do I Need Fda Approval To Sell Soap?
No, you don’t need FDA approval to sell soap. Soap is exempt from FDA approval if it meets the definition of soap and is not intended to treat or prevent disease. Ensure it consists mainly of alkali salts of fatty acids and is marketed solely as soap.
What Is The Biggest Mistake First Time Soapmakers Make?
The biggest mistake first-time soapmakers often make is neglecting accurate measurements. Proper ingredient ratios are crucial for successful soap. Without precise measurements, the soap may not solidify or could irritate the skin. Accurate scales and diligent attention to detail help ensure a successful and safe soap-making experience.
Is It Legal To Sell Homemade Soap?
Yes, selling homemade soap is legal. Ensure compliance with local laws and regulations. Label ingredients clearly and follow safety standards. Consider getting insurance and necessary permits.
Conclusion
Creating handmade soap bars is rewarding and fun. You’ve learned simple steps to make soap at home. Use fresh, natural ingredients for the best results. Experiment with colors and scents to personalize your bars. Share your creations with friends and family.
They’ll love your thoughtful, handcrafted gifts. Enjoy the process and embrace your creativity. Making soap is a great way to relax and unwind. Keep practicing and refining your skills. With time, you’ll craft soap bars like a pro. Happy soap making and keep exploring new ideas!